My Creative Process
In recent years I’ve found a most enjoyable approach to making art and I’d like to share it with you. I’ve read about other artists and how they approach their work. Some plan out their project in great detail before they begin. I’ve tried that approach and it doesn’t work for me at all. Anything that’s “super-planned’ usually ends up in my trash can.
Gathering
Gathering is the first stage of each project I undertake. For years I’ve kept an idea file. I have a huge stack of ideas and every once-in-a-while I’ll go through the stack to see if any of the ideas still have “juice”. The ideas that stay on top become project candidates. They get put on my project list where they can live a long time before I take any further action. When I start to get serious about an idea, I create a project box (I like the clear Iris scrapbooking box from Michaels) and begin to gather related ideas, materials, models, photographs, articles – anything that I might use to develop the project further.
Marinating
When the box gets full I start working with the contents and playing around with “stuff” to see what my next steps should be. I decide what kind of project it will become – book, collage,assemblage, or piece of fiber art. The time I spend playing at this stage is great fun. I love Pinterest and I often review my “pins” to see if there are any interesting ways to expand my thoughts. It’s exciting to revisit the colors, shapes, textures and ideas I’ve filed away. Often inspirational flashes will come that help me “jump-start” the project.
Producing
When the time comes to construct the project, I have a clear idea of how I will begin. As I’m building the piece I let the work guide me. I do one thing at a time and the work directs the next step. This keeps me from feeling overwhelmed. Since it is a discovery process, I don’t usually know what the finished project will look like. But I do know when the work is done, because it tells me intuitively when there is nothing left to do. By keeping an open mind, I experience delightful creative discoveries and hopefully a unique finished product.
This is what I like most about making art!!!!
Mini Quilts
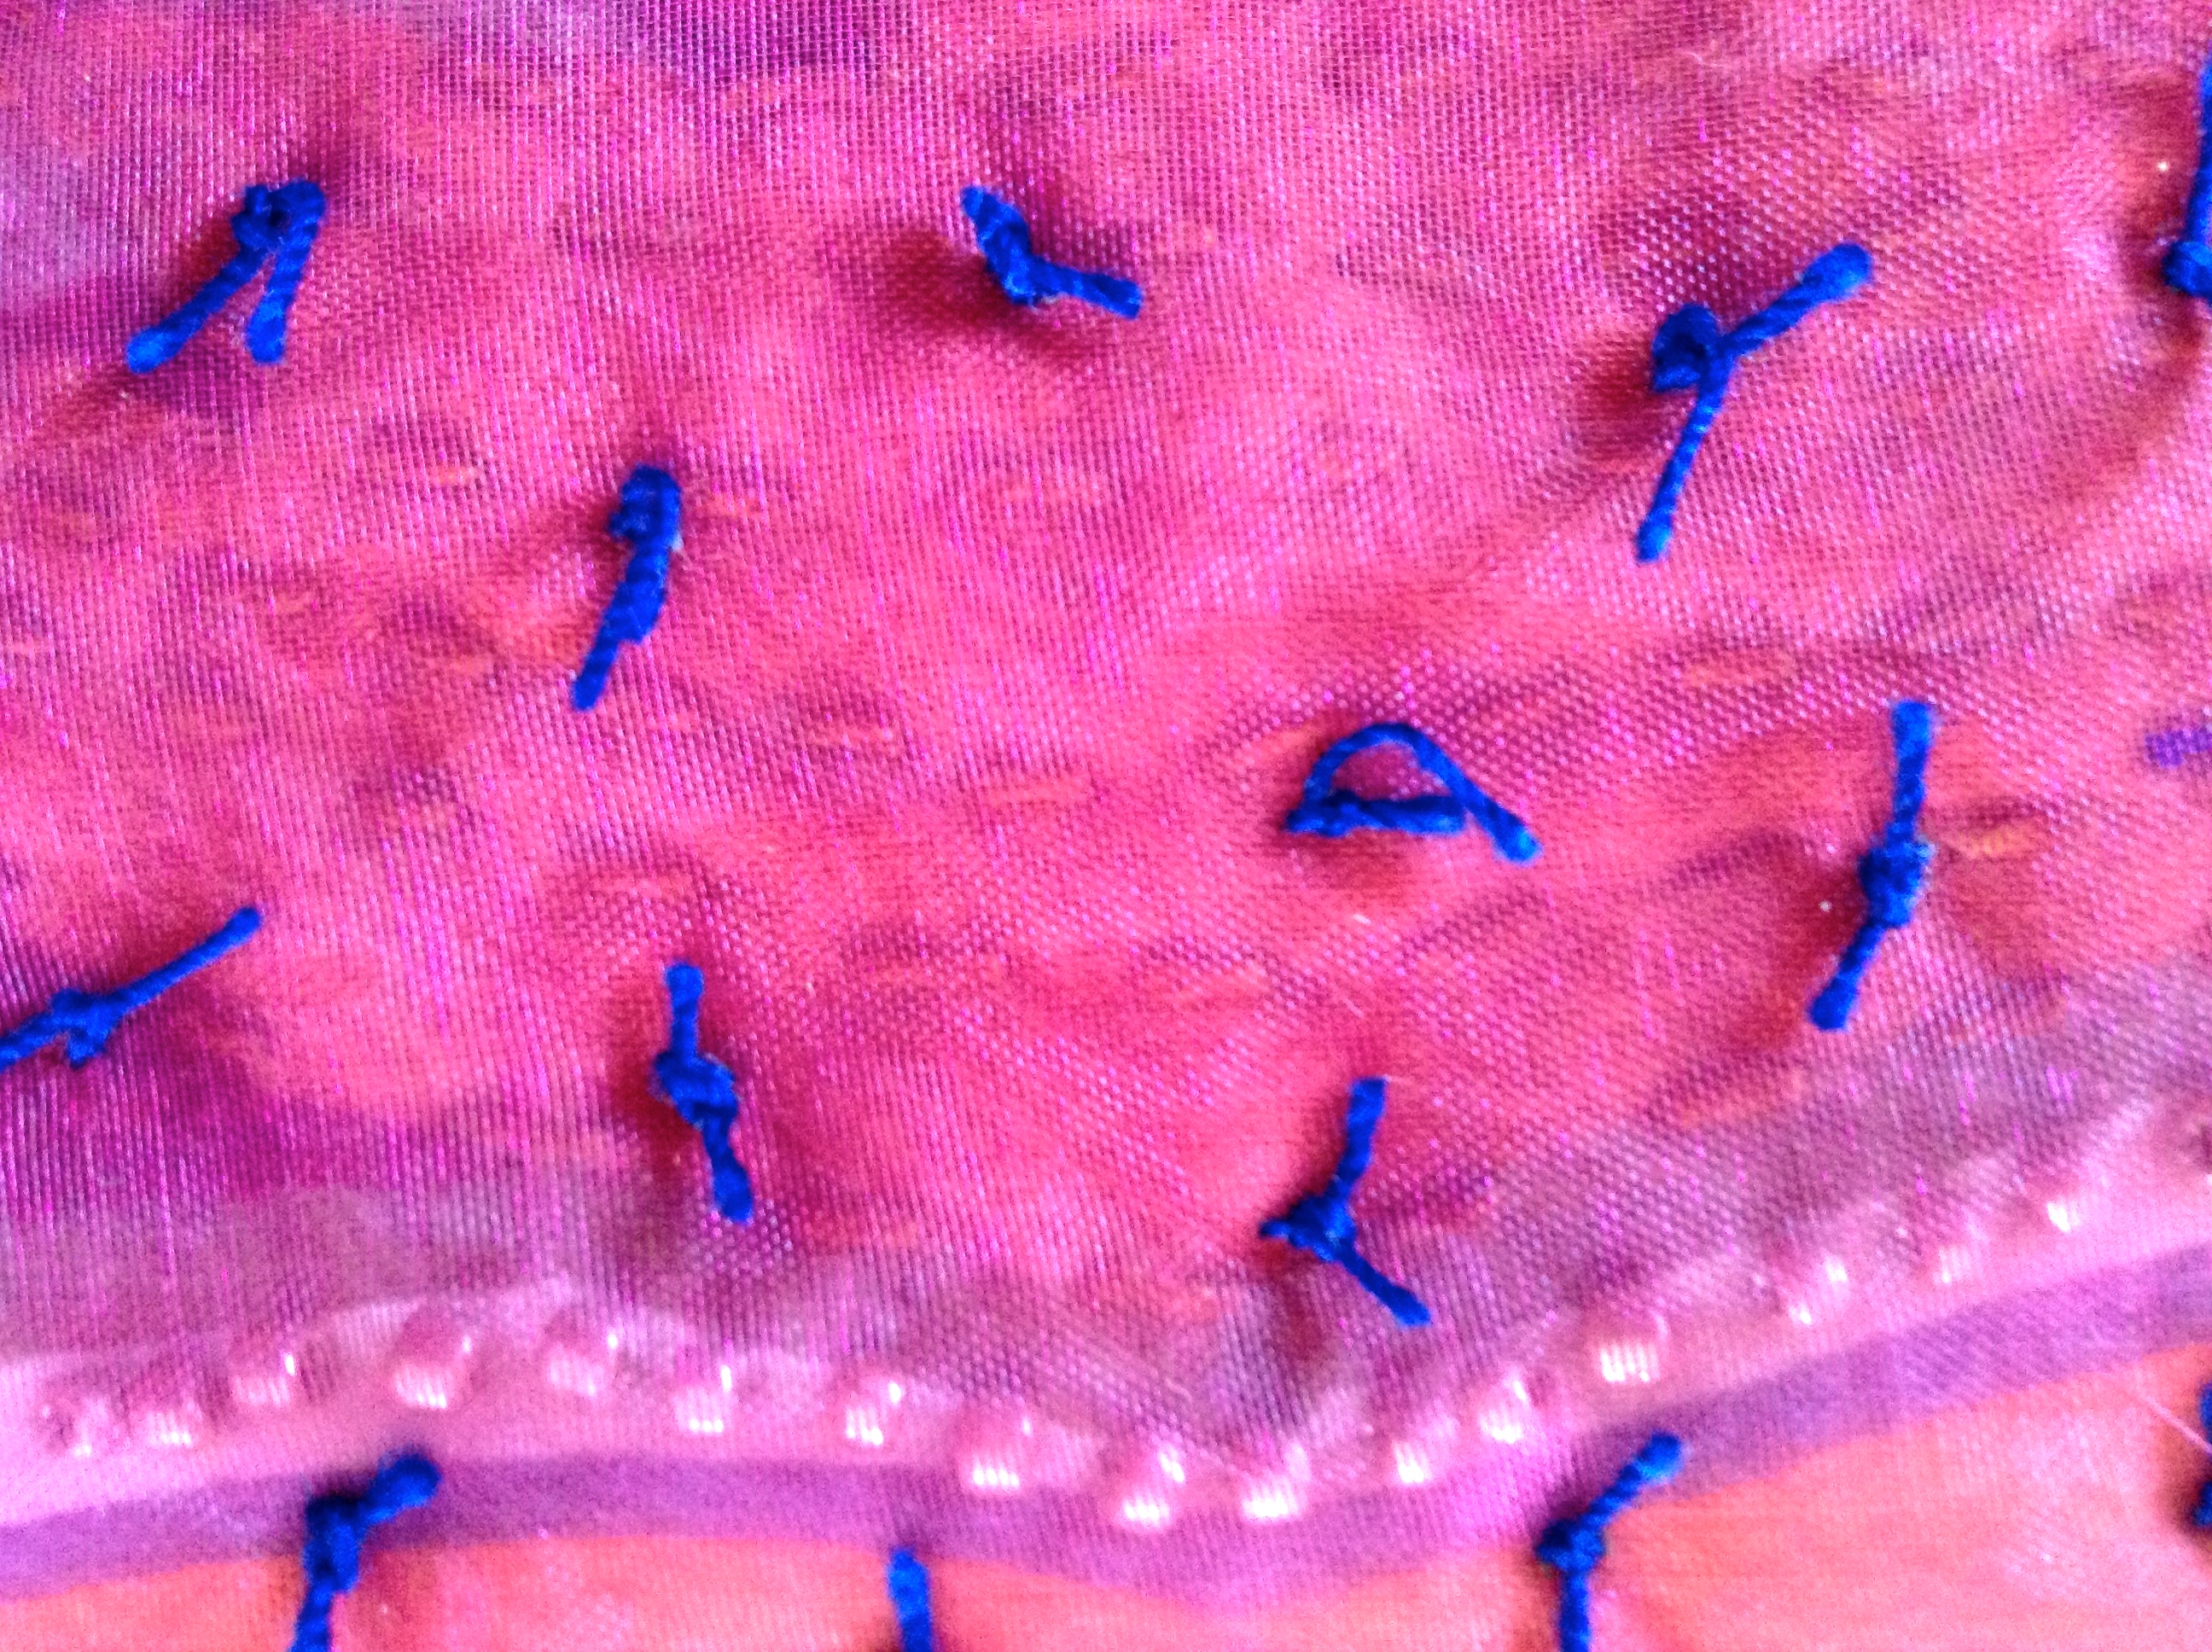
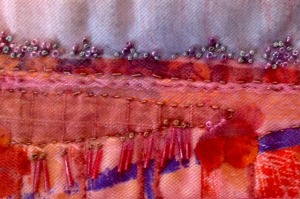
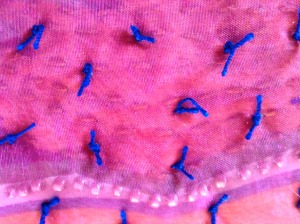 Inspired by my friend, Barbara Snow from Bellingham, WA, I’ve been having a lot of fun making small quilts using running stitches and French knots. I’m not a quilter but the idea of a card sized quilt made with fabric scraps and running stitches was appealing.
To get me started Barbara gave me a baggie with a small pile of fabric bits and pieces and some cotton batting. One could use several layers of old sheeting, percale, or a piece of felt instead of batting. There was also a piece of scrap fabric for the backing that coordinated with the scraps of fabric in the bag, some sheer fabric (netting, organza etc.), ribbon, and several kinds of thread. The only additional tools I needed were scissors, needles, a thimble, pins and beads.
I started by making a “cloth sandwich” with a piece of printed fabric, cotton batting and a piece of an old sheet. I basted these together about 1/2 inch from the outer edge and then to make sure the fabric didn’t shift, down the middles.
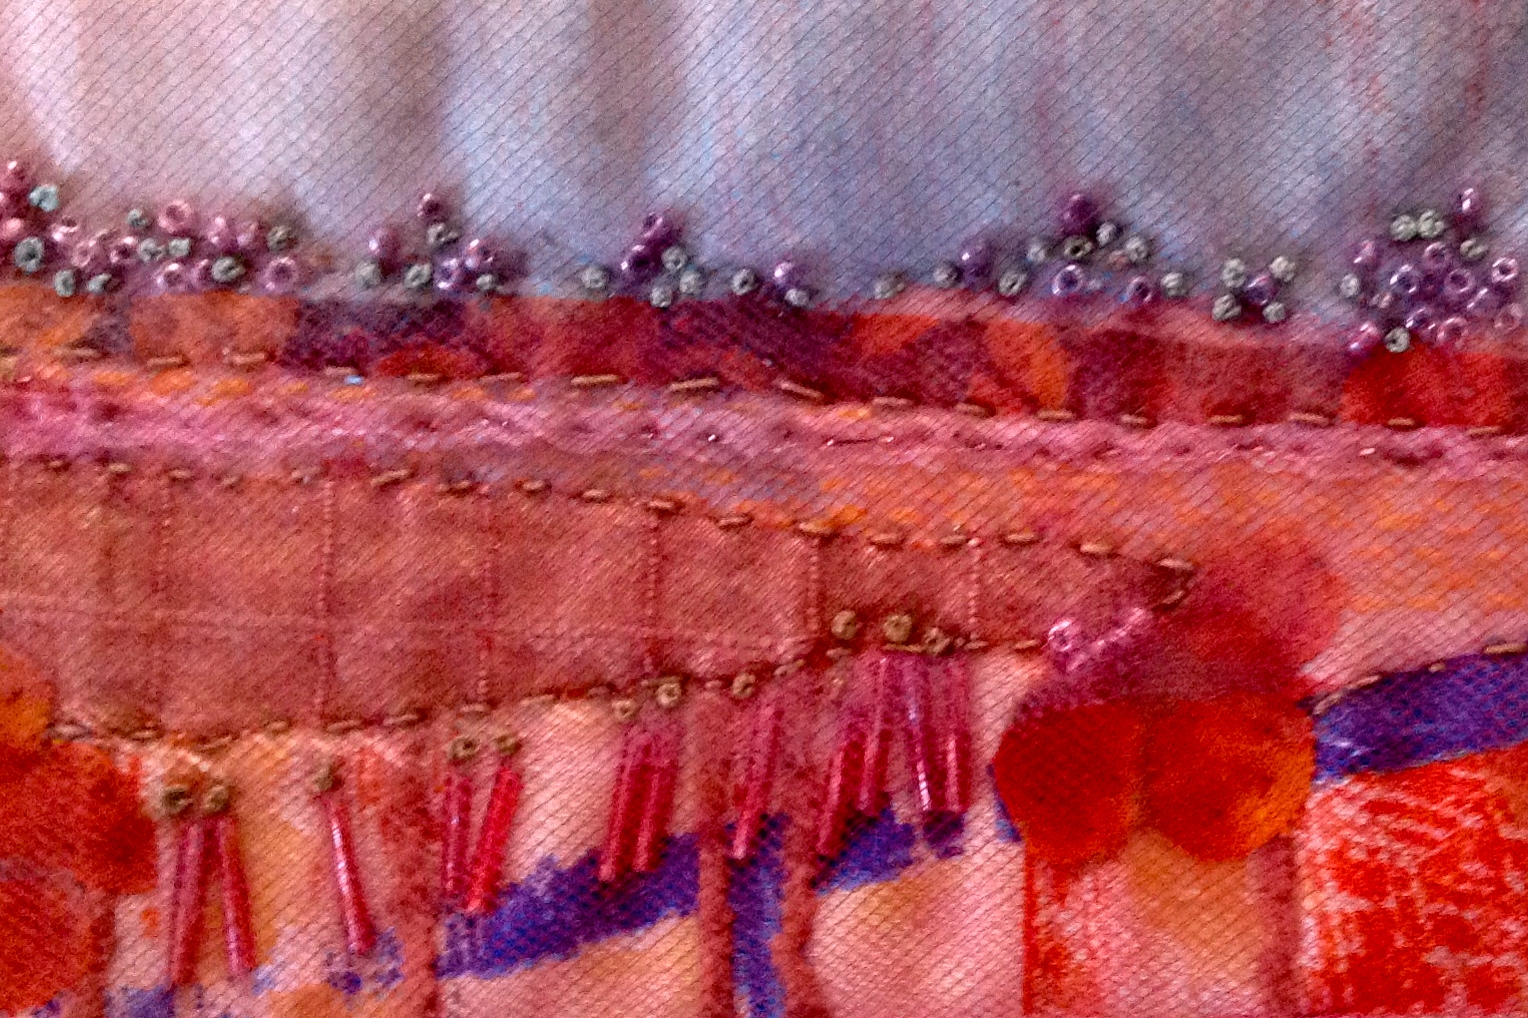
Then the fun began. After staring at the piece for while, I start stitching without any real plan for the finished product. I ran a line of stitching from one edge to the other. It turned out to be a horizon line. Then I started stitching around some of the shapes. Next I added some knots for texture and some beads and more stitching. Each time I changed materials I asked the work to tell me what to do next. I used the sheer fabric (netting and organza) to “glaze” the surface. I tacked the fabric in place with tiny stitches and then added some beading on top to anchor it in place.
The final step involved adding a backing to protect the stitching. I cut a piece of fabric slightly larger than the little quilt. Next I folded in the quilt edges to the inside and basted them in place so that they formed a finished edge. To finish the back and protect the stitching, I cut a piece of fabric and pressed under the edges so it almost met the quilt edge. I used a blind stitch to hold it in place! And my little quilt was done.
 This was so much fun to make. It was finished in several hours – mostly while I watched TV with my husband. I decided that this type of project is a perfect travel activity because the materials and equipment fit nicely into a baggie, and most of the work can be done in my lap.
For fun, I made up some baggies with fabric, batting, beads, and thread and gave them to friends, just in case they wanted to try it out.
A Hug and A Kiss!!!
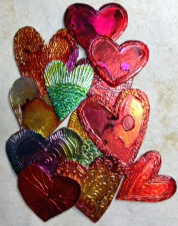
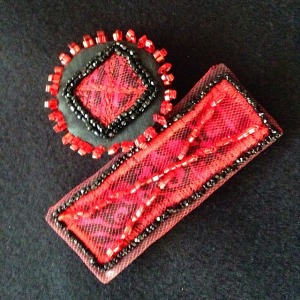
These mini pieces of stitchery were originally going to be used on a mini quilt. But I found myself uninspired. Then I thought I’d use them on my birthday doll. But that didn’t speak to me at all. I finally decided that I would turn them into fabric pins. I finished the rectangle with the big X on it and realized that I had beaded a “kiss”. If I placed the small square in a circle and it could be a “hug”. It was easy to finish up both pins!! I love the way they work together on a dark jacket.
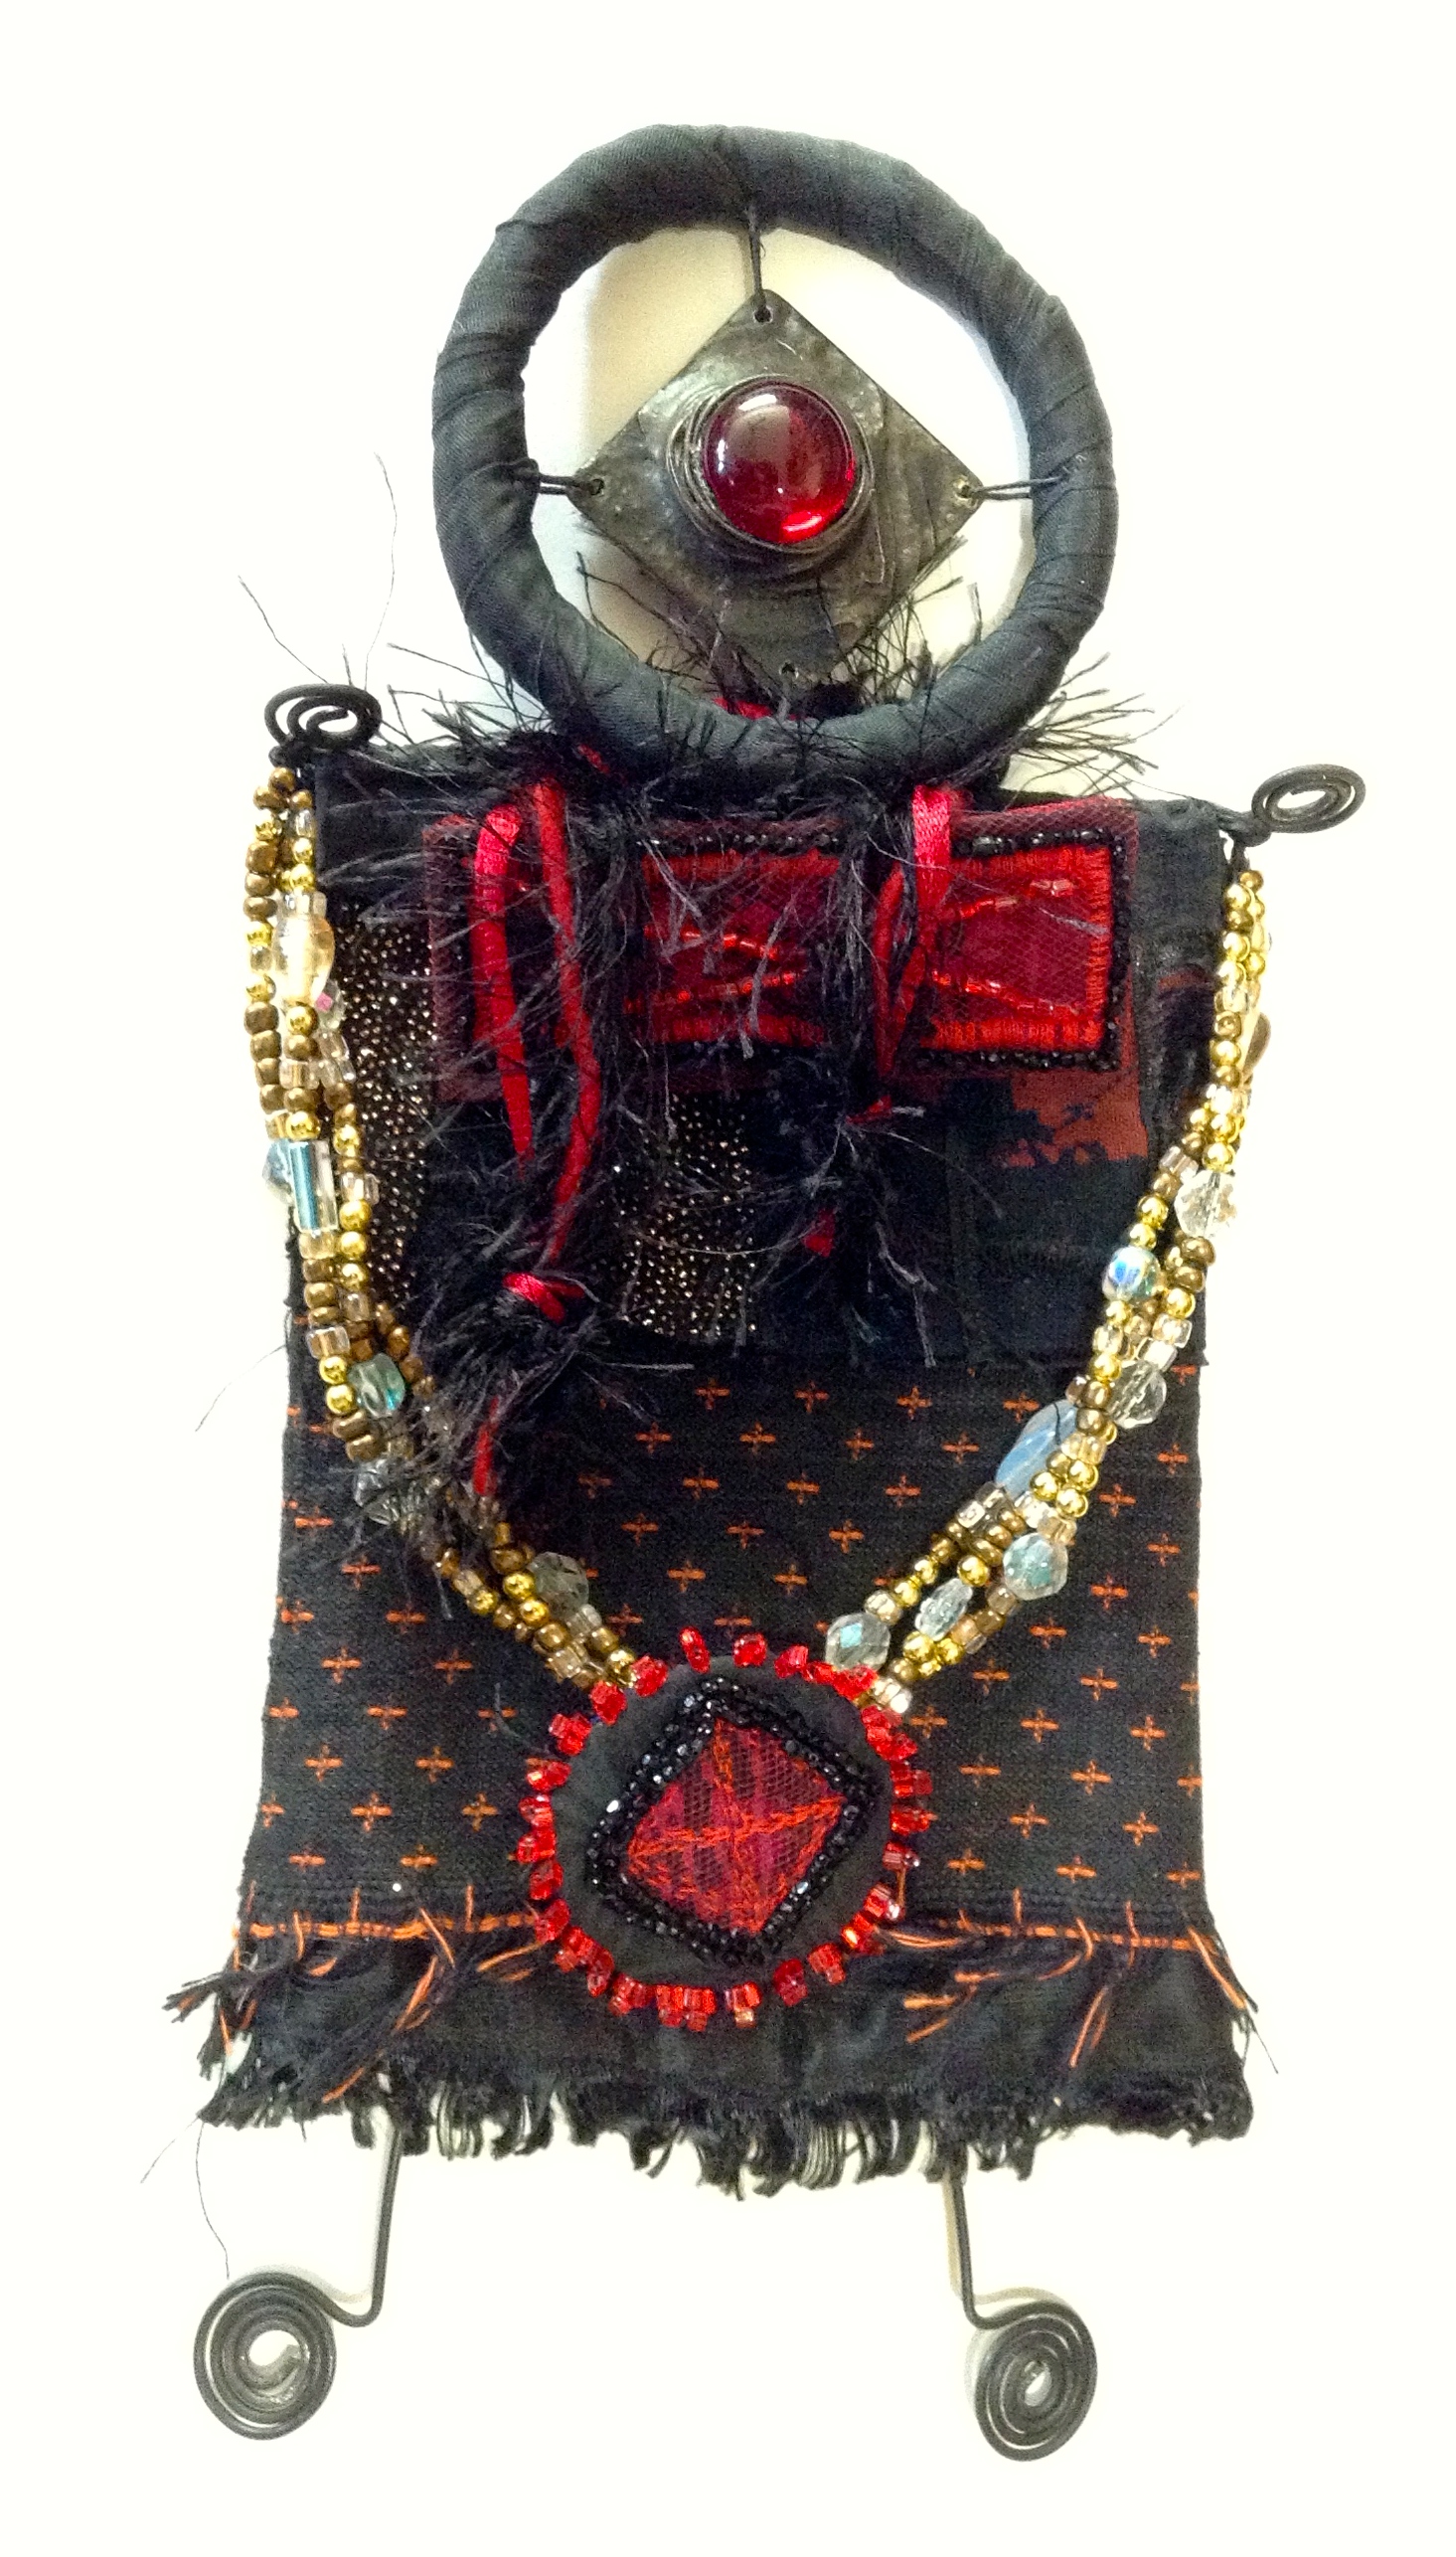
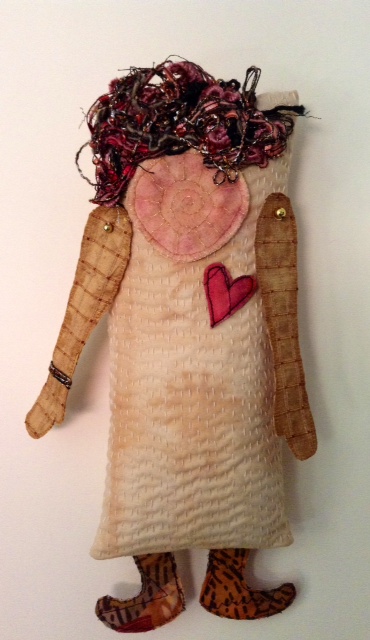
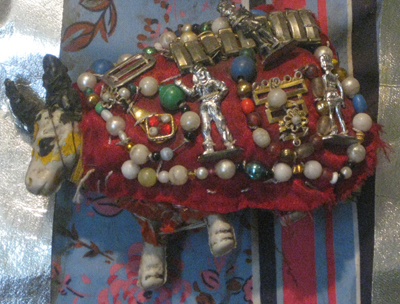
 Donatella – My 2014 Birthday Doll
I just finish my birthday doll for 2014. Her name is Donatella. She was a lot of fun to create and a good example of my personal creative process in action.
I started her several weeks before my birthday by looking at my Pinterest file on art dolls. I had no visual idea for what the doll might be. Next I started gathering materials. The collection included fabrics caught my fancy, a big of metal “findings’, a drawer full of yarns and ribbons and a multitude of beads of all sizes that seemed to go with the fabrics in the pile.
I spent an evening playing with all this stuff, and making little stacks of things that seemed to go together. I had several small pieces of red stitching on dark fabric that I thought I might use in a mini quilt, but then I thought it might be fun to use them on the doll. I vacillated back and forth but the stitchery didn’t go with any of the stacks. So I set them aside for another project.
I was drawn to a piece of crazy quilted fabric I had made several years ago for a fabric bead project. I kept coming back to it so I knew it had to be part of the doll.
Once that decision had been made, the doll began to take form. I found the jeweled piece which told me it was part of the doll’s head. I felt it was too small to be the whole head so I formed a wire circle and wrapped it with black taffeta. Voilla! Donatella’s head appeared, and from that point on I began to see her as a finished doll.
I knew the fabric would be used for the body. My initial thought was to stuff the body, but somehow that didn’t feel right. Playing with fabrics I formed a body shape that worked with the head. Next I formed a petticoat which provided dimension without making an actual stuffed body part. I studied the head with the body and determined that the legs and arms would be formed with wire and beads.
The biggest challenge came in how to “engineer” the component pieces so they worked together. After I made the arms and legs and I had to figure out how to attach them. I ended up using glue and stitching.
The final step was embellishment to enhance her personality. I used ribbon and yarns to create a scarf. My final delight came when I added more color. I put the “hug” in the hands of Donatella and used the “kiss” as the yoke of her dress, coming full circle back to my original intention of including the little red stitcheries.
Donatella now lives on my studio wall as a sweet reminder of achieving my 77th year!

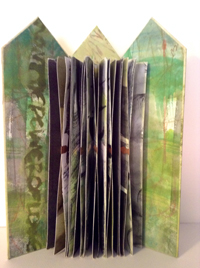
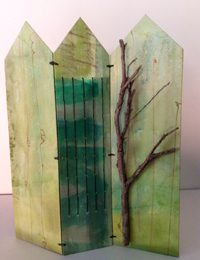
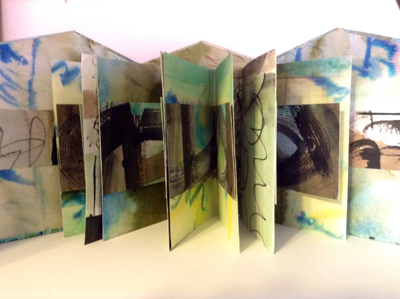
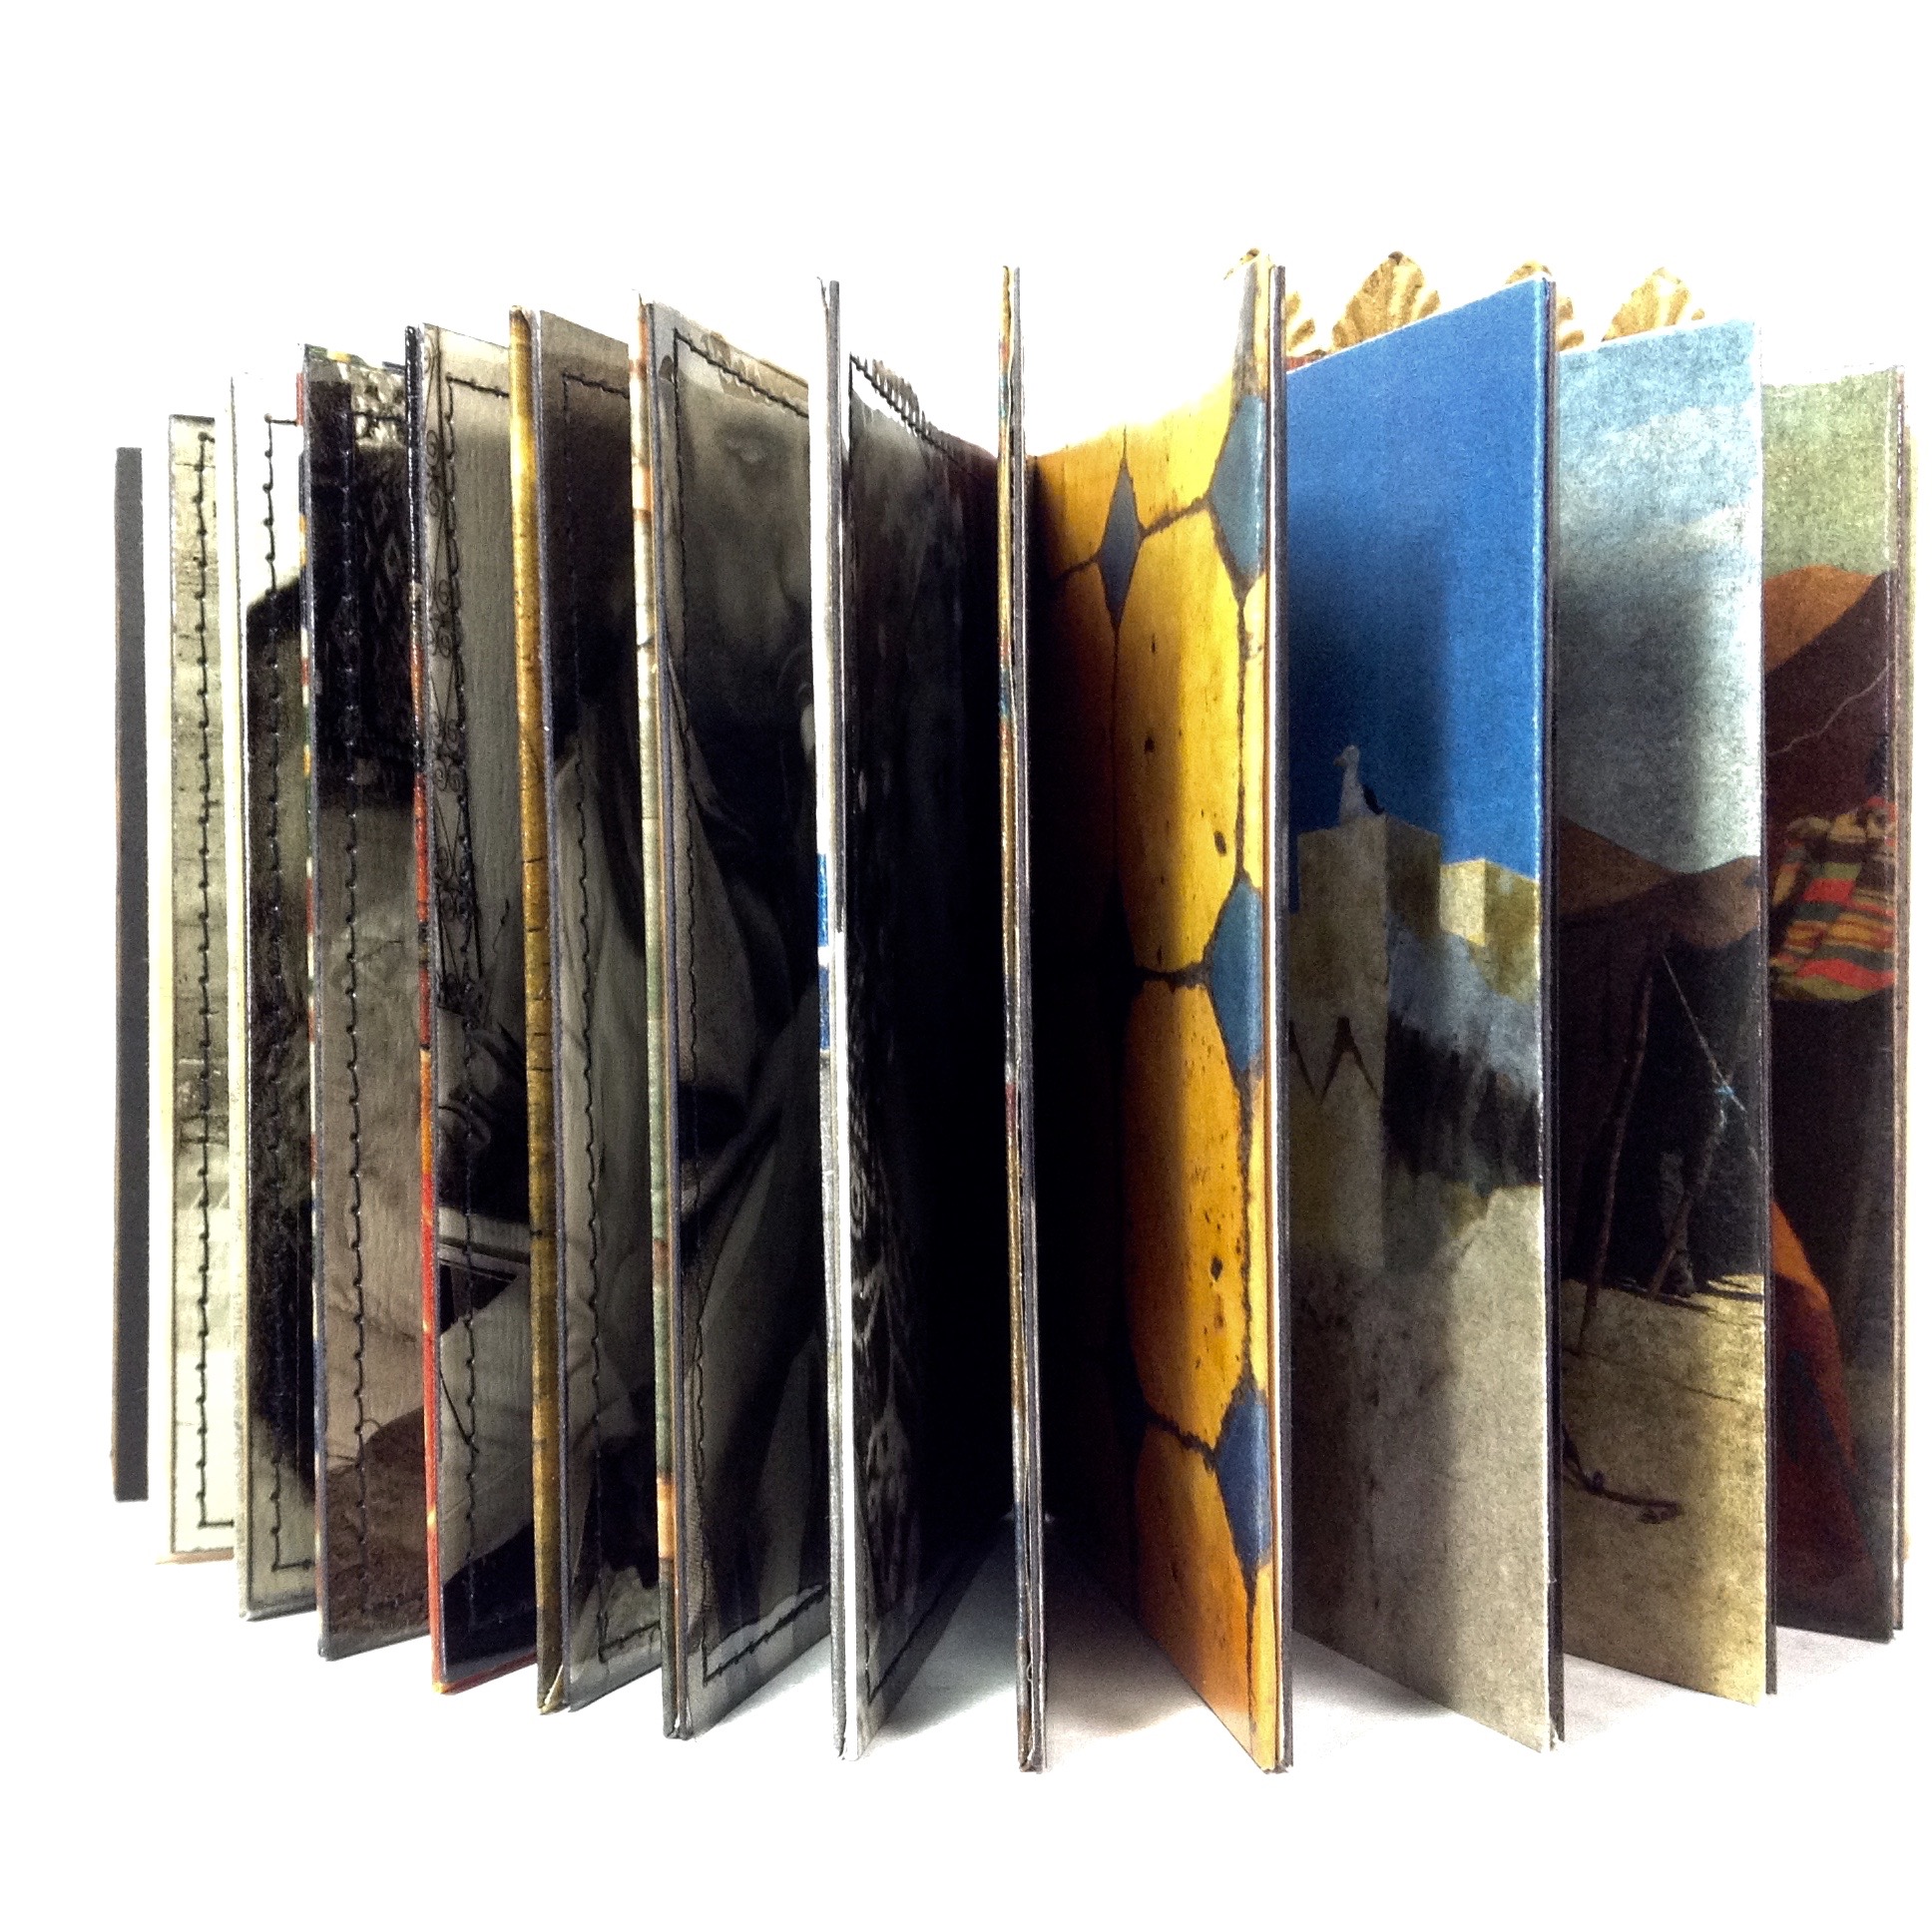 I thought about how a book of colored photographs, page after page, could become boring. I looked through my files to see what I might use for contrast and found that I had a number of “grab” shots of people that could work in the book. Moroccan people do not like to be photographed, and I still feel a bit guilty that I snapped them when they had not agreed. But I decided to use them in this particular book because it would not be for sale and it will have limited circulation. I believe that my treatment of their photos by printing them in black and white on transparencies, is a way of honoring them and their culture.
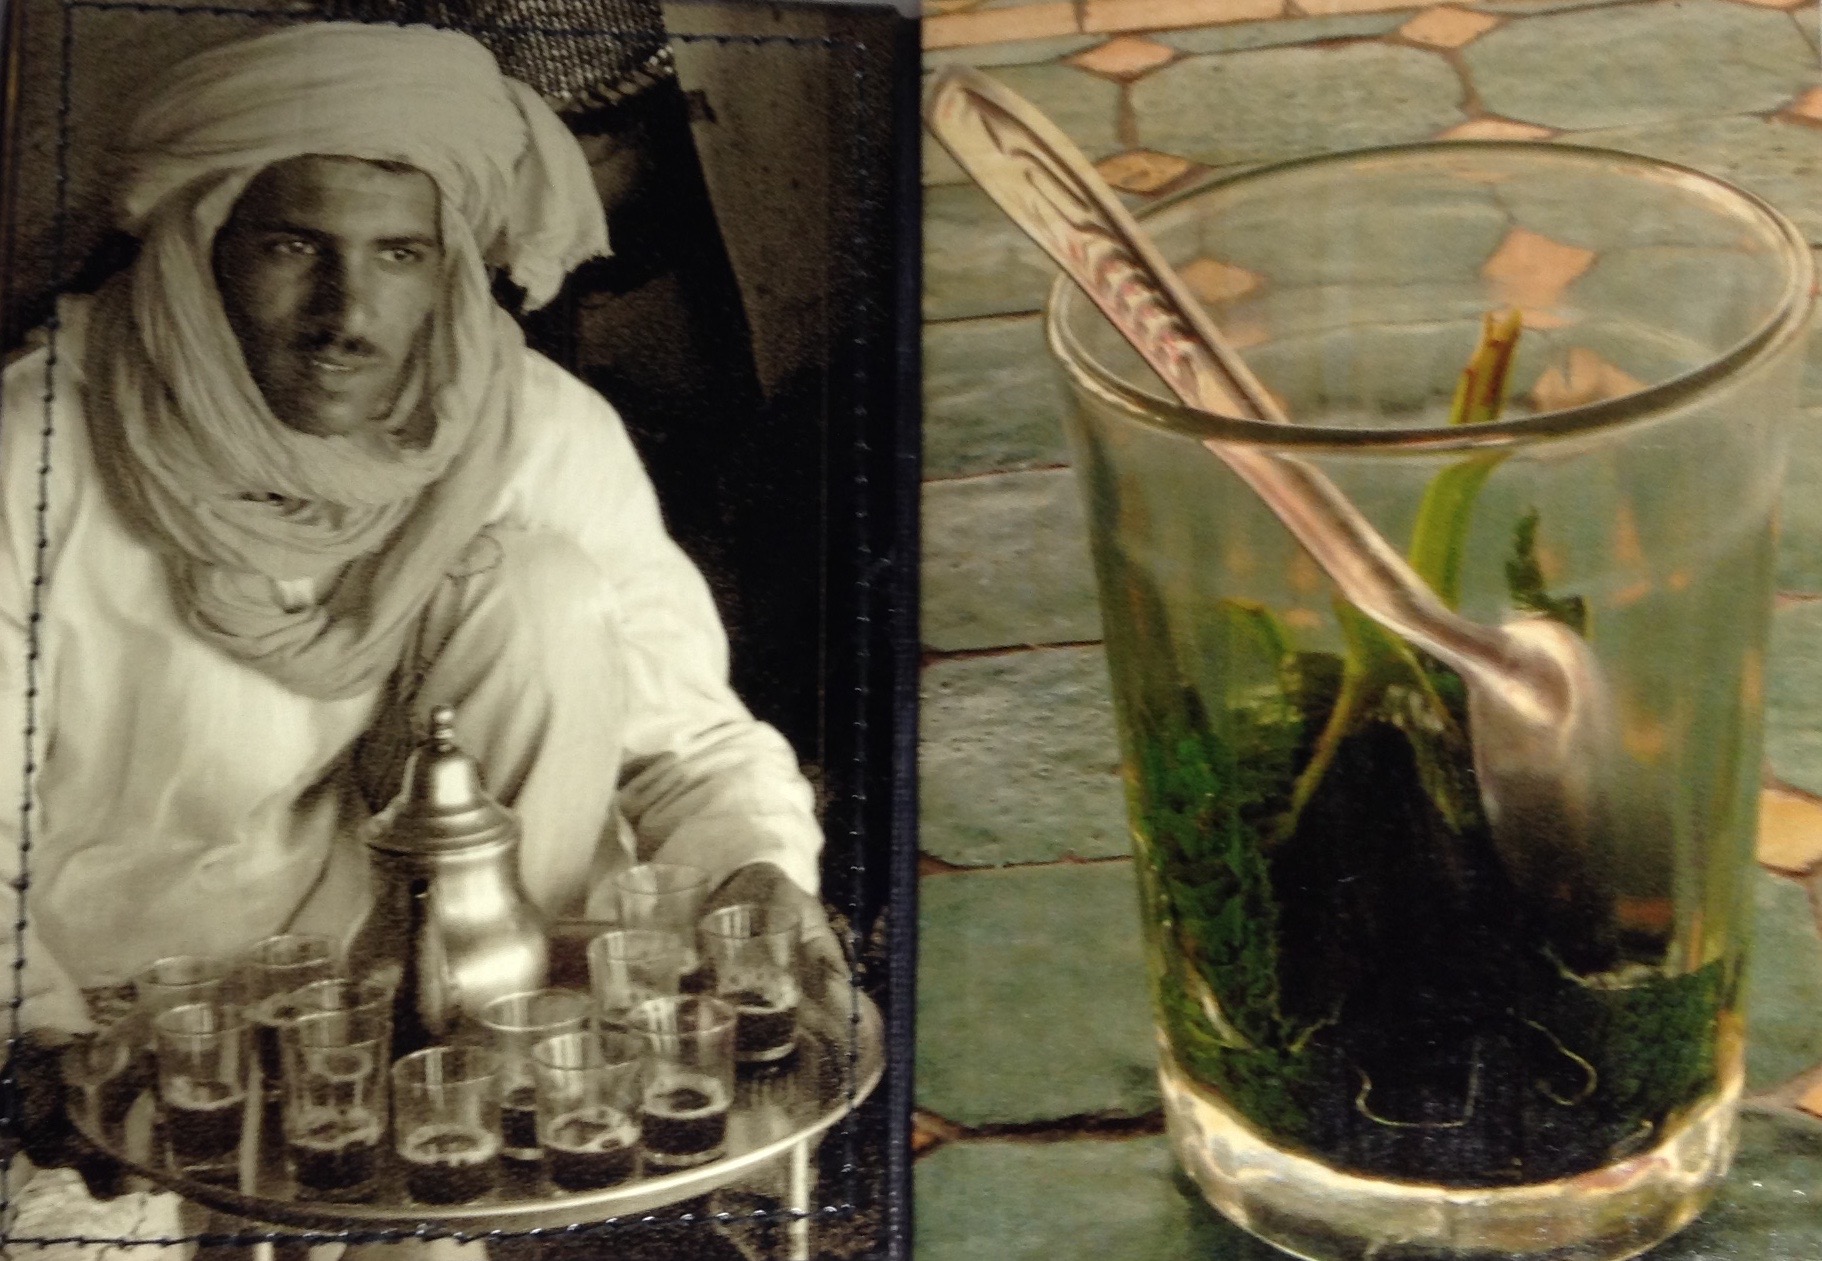 Once I had prepared the photographs – printing, treatments, and mounting on individual pages, I began to explore the kind of book structure to use. After thought and experimentation, I determined that a stiff leaf binding would be the best format.
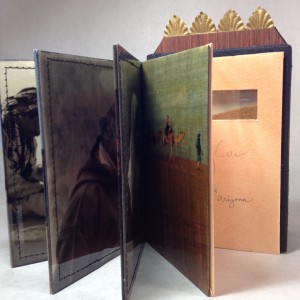
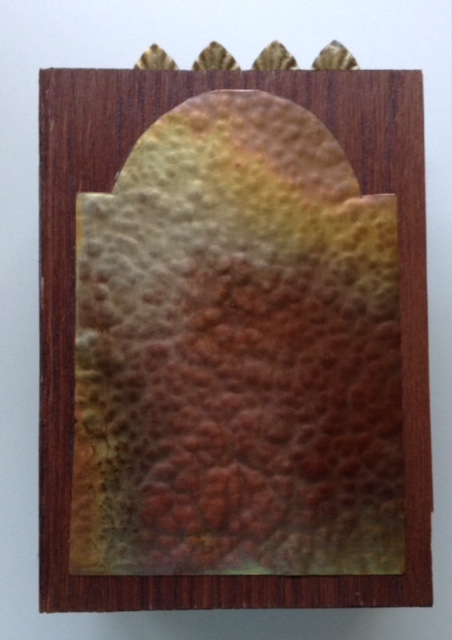 The book is now complete and my memorial to Morocco is in a form that will continue to bring back fond memory of that beautiful country. I feel the end result is definitely a “Mabel Dean” book. As I hold it in my hands I can see the Daniel Essig influences, subtle and sensory.