Lessons From Geese

Lessons From Geese

Last year PaperWorks presented members with the challenge to repurpose
a cigar box. The challenge was titled “Outside the Box”. It made me really think about what can happen outside the cigar box as well as inside!

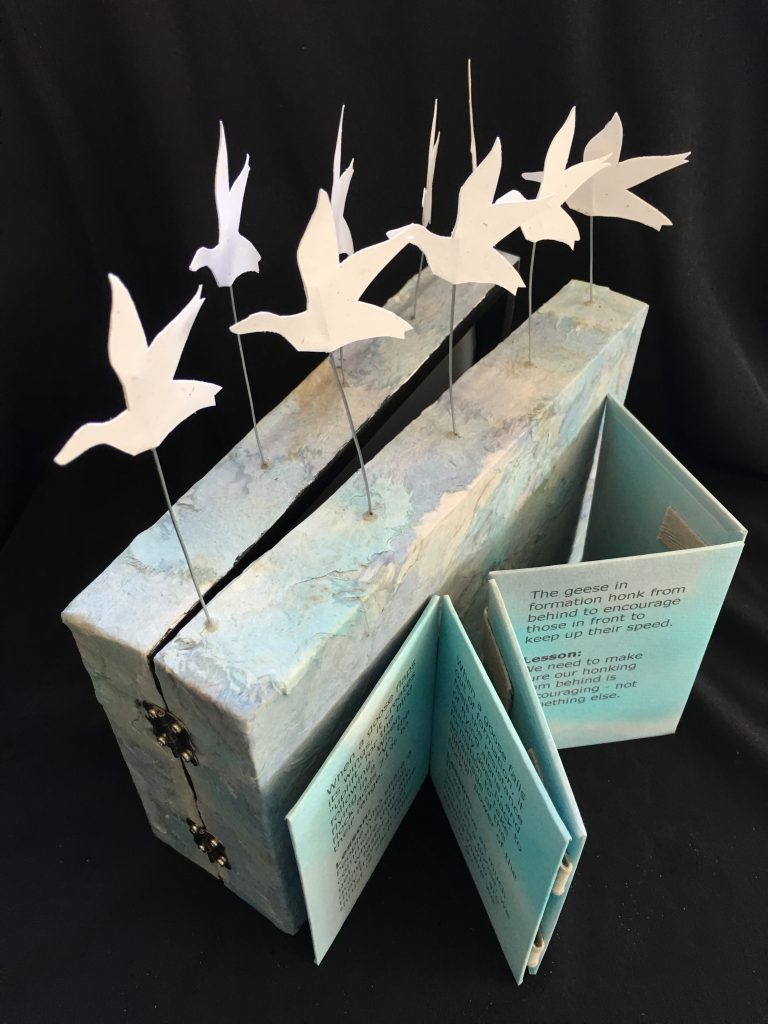
I have a file of favorite quotes and went through it to see if anything spoke to the challenge. I found the page with “Lessons From Geese” and immediately realized it was just right for my cigar box! And revisiting it today made me realize how appropriate it is for this time in our lives when we are facing the pandemic and the isolation that the quarantine has brought to our lives.

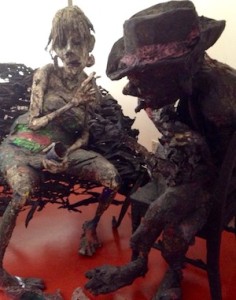
The box is used as the “stage” for geese in flight. I’m sharing this with you today in the hope that it will inspire you to maintain connections with your family, friends and community because they are necessary components to the life that we aspire to. We can not thrive without others in our lives.

The text below was written by Dr. Robert MacNeish and made popular by Milton Olsen, a minister and bird lover.

Lesson One –
As a goose flaps its wings, it creates “uplift” for the birds behind it. A flock of geese flying in a “V” formation has 70% greater range than a single goose flying alone.
People who share a sense of community with a common goal can get there quicker and easier because they are traveling in snych with each other.

Lesson Two –
When a goose falls out of the flock’s formation, it feels the drag of flying alone, and quickly rejoins the flock in formation to gain from the “uplift” of the bird it is following.
If we have “goose” sense we stay in formation with folks headed where want to go. We accept their help and give help to others.

Lesson Three –
When the lead bird tires, it falls back into the flock to enjoy the lift power of the bird in front.
It pays to take turns, sharing the leadership and hard tasks.

Lesson Four –
Geese flying in flock formation honk to encourage those up front to keep up speed.
By encouraging the others in our flock to do their very best, we will reach our goals.

Lesson Five –
When a goose is wounded or sick ad leaves the flock, two geese drop out and stay with it to help and protect it until it is able to fly again or dies. Only then do they resume their journey.
If we have a s much sense as geese, we stand by each other in tough times as well as good times.

I like to read these goose lessons from time to time to remind me of my role in the “flock”. Thich Nhat Hanh teaches us about interdependence and to me it is a fundament truth which requires daily acceptance. The older I get, the more I realize the wisdom and importance of this basic lesson in being human.

Another Birthday…Another Doll

Some of you know that for the past 5 years I’ve made a doll to celebrate my birthday.  With Ed missing, it was not a day I was looking forward to at all.  I scheduled it fully so there wasn’t a lot of time to be alone.  I spent the morning in a meeting and took a class in the afternoon and went out for dinner to co-celebrate birthdays with friends.  Came home exhausted and went directly to bed.

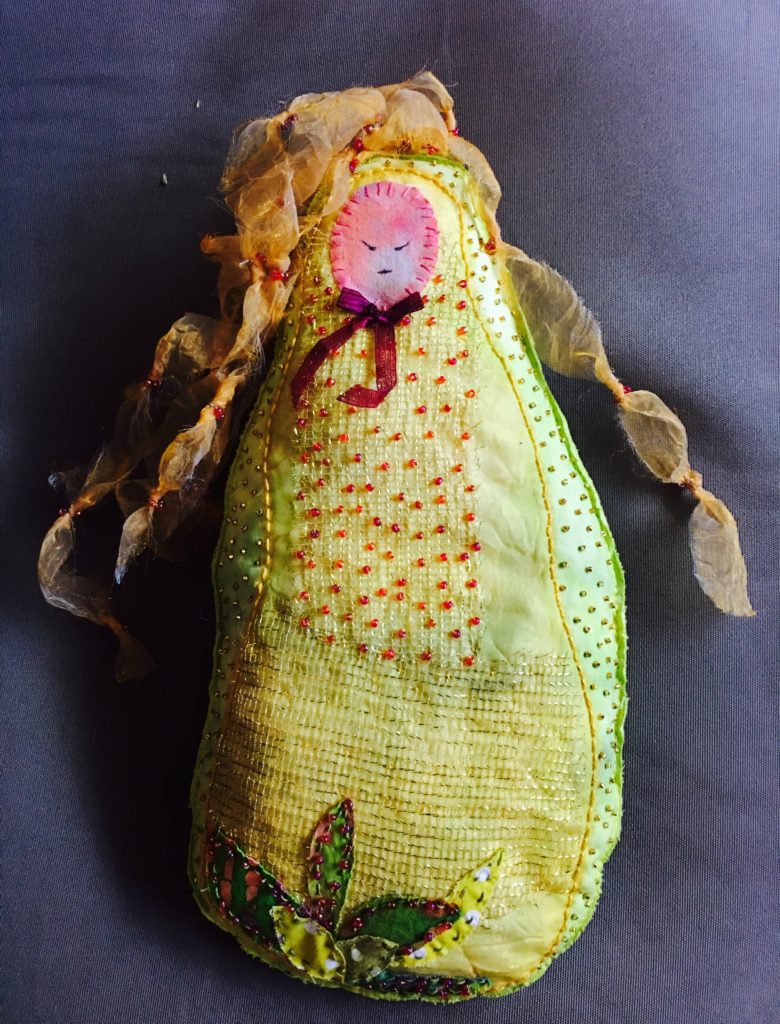
I started the next day and decided to make a simple “stuffie” style doll with beaded embellishment.  As a “process” artist my projects evolve and I never know at the start what the finished result will be.  I selected percale for her form which I painted with diluted acrylics. While the fabric was drying I collected fabric scraps, bits of ribbon and beads.  These included batik quilting scraps, golden organza and scraps of a grid-like fabric, magenta ribbons (from my sister’s birthday gift packages) and gold, red, magenta and green beads.

I cut out four rectangular layers (3 percale and 1 thin white felt) for the dolls body.  After setting aside one layer for the back of the doll, I made a fabric sandwich (percale, white felt, percale) and basted the layers together.  Next I drew the doll shape on to the top layer which I then machine stitched in place.  My first embellishment was to tack the golden grid fabric on the body of the doll.  After fooling around with the golden organza I decided to use it for hair as I couldn’t find a good place for it on the doll’s body.  Next came beading, then the application of the leaf shapes on the bottom of the doll, more beads and finally a face which I painted on percale and then hand-stitched in place.

I didn’t have a clear vision for the hair, and I wanted to use the organza, so I started playing and voila!  I found I was accumulating strands of hair.  I knotted them and added beads and found I had created braid-like ropes!  When I pinned them into the top of the head they fell into a unique hairdo which seemed just right.

1016doll-1

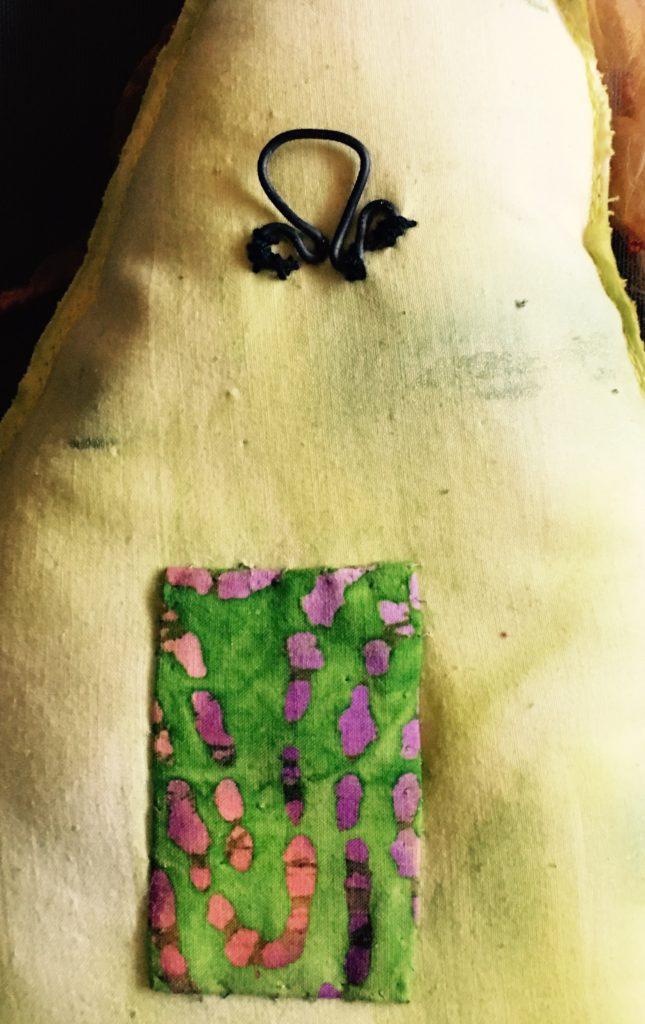
I fashioned a hanger from some wire and sewed it on to the back reinforced with several layers of scrap percale.  I made a 1.5” slice vertically down the back for stuffing access.  Next I pinned the back on to the top layers and machine stitched the doll around the edges several times.  Using sharp scissors, I trimmed off the excess fabric leaving about 1/8” around the outside stitching.  On the back side I ran a thin bead of PVA over the stitching so it couldn’t unravel.  The final finish of the edges involved dipping my finger into diluted acrylic paint and rubbing the exposed raw edges.  I like the way that the green paint serves to further define the edge.

2016doll-2

I ended by tacking her hair in place on the body as it had a mind of it’s own, going in places I did not want it to land and covering  the slit on her back with a decorative patch.

Now, it’s time to dream up a new project. In the meantime, I trust you are happily involved with your own projects and it being October I’m guessing that your fall calendar is already filled to the brim.

A Return to Watercolor

A Return to Watercolor

When my sister, Barbara Wolff, retired a few years ago, she decided that one of the things she wanted to do was to develop her drawing and painting skills. She had been journaling for many years and had incorporated informal doodles, sketches and cartoons on her pages but they were almost always an adjunct to her writing and not at all what she considered to be artful.

I always thought her journals were quite amazing. Then she announced that she was taking a drawing class at the local community college. That class marked the beginning of a whole transformation of her art and has brought her great joy.IMG_1483

As part of her adventure she has become very involved in the urban sketching movement in Santa Fe and goes sketching multiple times each week. Her work is stunning! Every time I visit her I am motivated to start drawing and painting again, but for some reason the blank page intimidates me and I become immobilized.IMG_1490

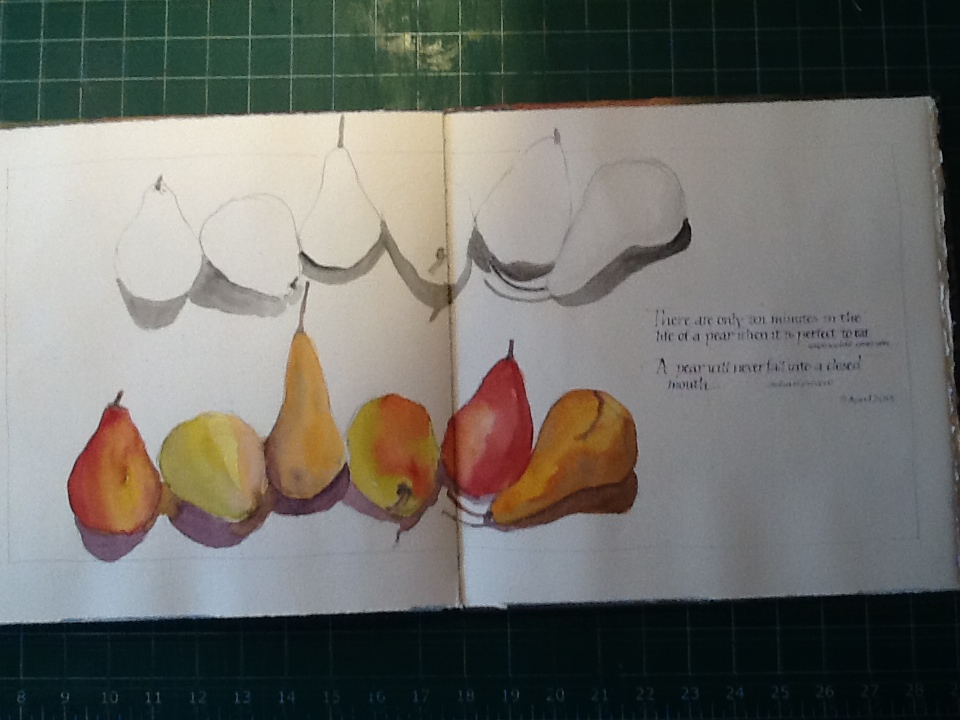
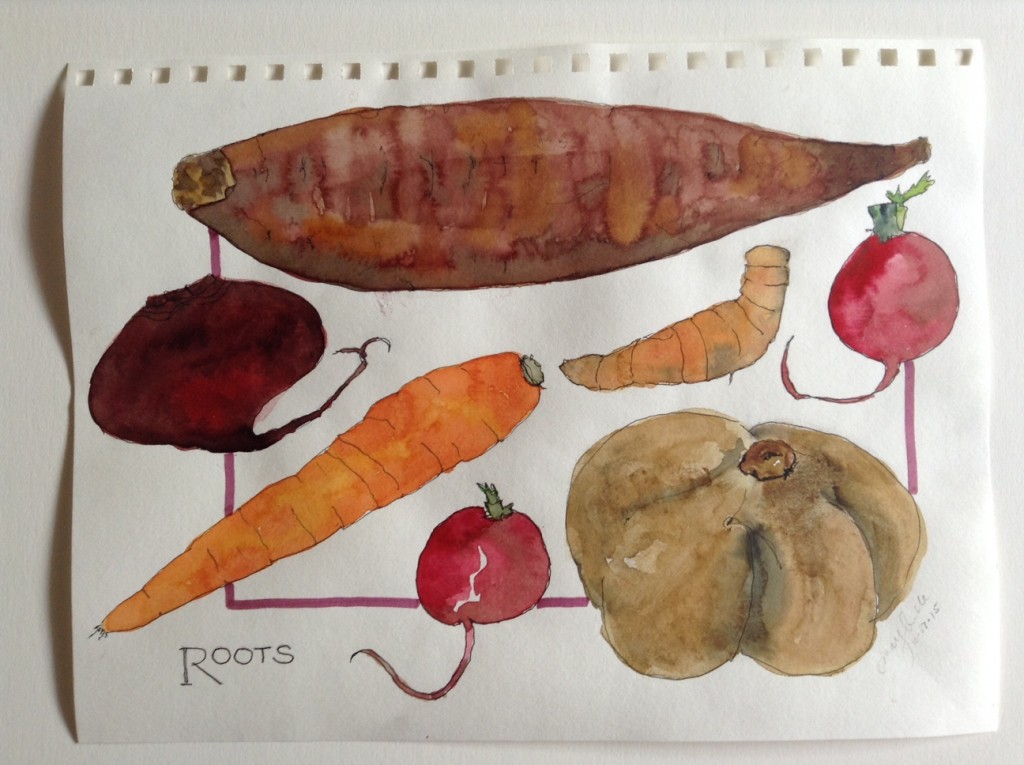
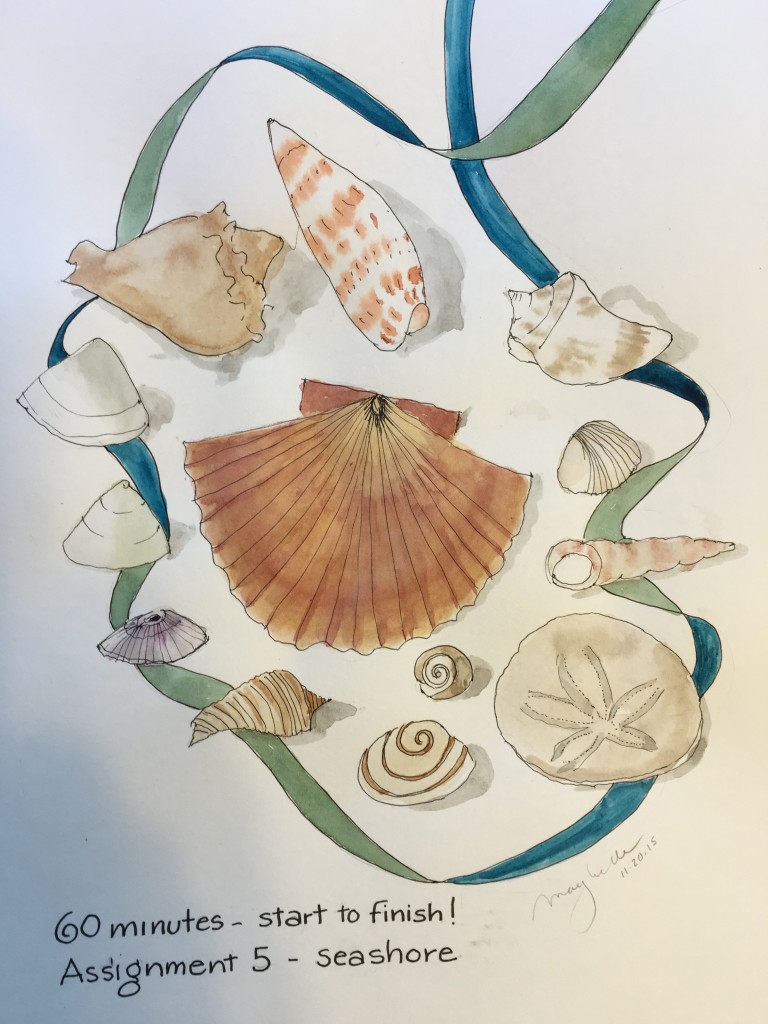
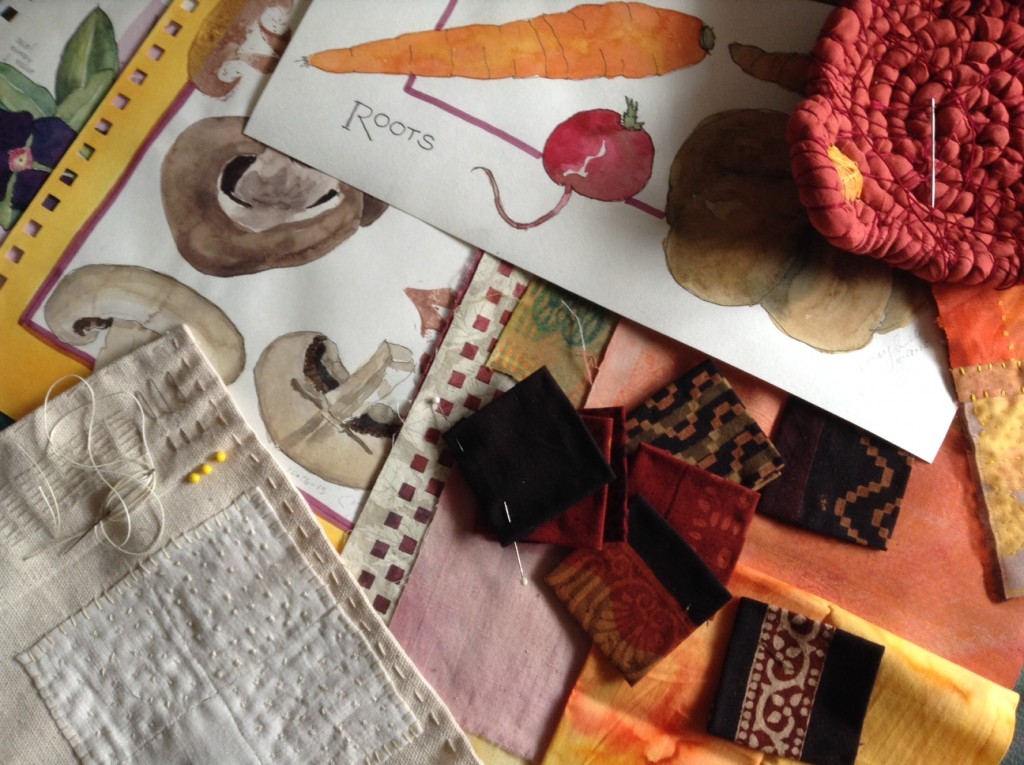
When Jane LaFazio announced a six-week on-line class titled “Watercolor Sketchbook – Designs From Life” I decided that I should take it and see if I could move past my drawing and painting block. It’s been years since I’ve spent any quality time with my pen and my paint box and I must admit that the first assignment intimidated me big time.Roots

Now, after re-friending my tools and getting past that initial fear of failure and completing the first few assignments, I’m enjoying it once again.

jane5

I doubt that I’ll ever devote the time to sketching that my sister does, but I am beginning to enjoy again the experience of sitting with my sketchbook and my watercolors and becoming totally involved in the experience of being present and seeing this beautiful world we live in.

Feathers In My Pocket…a unique piece of “hand art”!


Preface:

So what is “hand art”?  When I was trying to categorize this piece, I came up with the term because it is something you must hold and explore with your hands. Some people might call it an “artist’s book” but it really is different from a book in that it is a collection of small objects.  

I also consider my artists books to be hand art as are other small works that can be picked up and fondled such as fetishes, small dolls, all forms of cards, little quilts, and even jewelry.  I’m drawn to making these small pieces partly because I like working small and partly because I don’t have a lot of storage space for large sculpture and paintings.

I like pockets a lot.  They hold the necessities of life such as a tissues, shopping lists, found treasure such as a feathers, heart shaped stones, bits of rusted metal, and coins. In fact, when I shop for clothing I avoid buying pants and jackets that have no pockets. I especially like to create pockets out of fabric and paper and put surprises in them.

I often find myself picking up stray feathers when I take a walk.  Over the years I’ve accumulated many black, grey and white feathers that have survived living in my pockets. So, one day several years ago when I was looking at my feather collection, it occurred to me that it would be fun to make an art piece using feathers and pockets.  I started a project box for this idea and have been adding ideas, feathers and other related materials ever since.  I dedicated my September art retreat to working with the feathers and pockets.

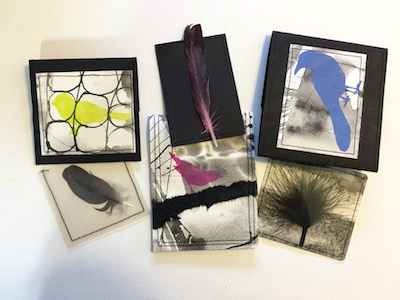
I decided that since most of my found feathers were black, grey and white, I should create the pockets using papers of similar colors.  I started with Sumi ink and Velin Arches, my all-time favorite paper, and made marks that reminded me of feathers.  These papers became the raw material for the pockets.  For contrast I added black art papers and built a series of seven pockets in assorted sizes.  I made bird silhouette stencils  to embellish the covers.

Recently I have been using stitching in my projects.  So I turned to my sewing machine as the main tool for creating pockets.  Somehow glue just didn’t seem to be the proper medium for pocket construction.

I was particularly challenged when it came to inserting the feathers in the pockets.  I discovered that they were easily damaged and needed protection so they could be handled. This resulted in the development of yet more pockets to protect and preserve each feather inside its pocket.3feather

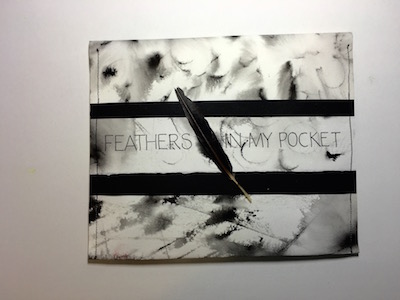
4featherOnce the pockets were finished and the feathers carefully placed inside I was faced with the challenge of how to make the group of pockets a cohesive art piece.  I placed them in a bird shaped basket I had found at a thrift store.  It didn’t quite work.  So my solution was yet one more pocket made from the sumi paper. I created a large pocket to contain the feathered pockets.  When you look inside, you are treated to the surprise – many little pockets to open and explore.
feather env.A final note:

I have many more feathers in my “project box” just waiting for pockets.  Time for another look at how they can be transformed into more hand art!!!!

A Special Kind of Art Retreat

This week Ed (my husband) and I are having an “art retreat week”. Since we have decided not to travel any more, we have been looking for some way of breaking our daily routines.  Both of us enjoy creative activities but we never have time for extended in-depth exploration.  Our busy schedules seem to interfere.

We came up with this idea last month as a way of traveling without having to leave Tucson!  Here’s how it works.  After breakfast we unplug the phone until after dinner, turn off the TV (I like noise in the background all the time) and limit our time on the computer to art-related searches and activities.

And every night for the entire week we go out for dinner!  We’ve discovered a lot of smaller family run restaurants with home-cooked foods that make us feel like we are in another country.  For example, last night we went to a sweet little Vietnamese place where the Pho is amazing. The night before Chicken Sharma and Lamb Kitta graced our plates. And this being Tucson, there are many small wonderful Mexican cantina type places.  So I guess you could say that we are eating our way around the world.

We start our retreat each morning at 8:15 a.m. with yoga stretches and a walk. Then we head off to our individual studios to focus on our projects. He’s very involved with photography, and this month I’m all over the place finishing up projects started months ago, taking an on-line class and catching up with my blogging.

For our September retreat I focused on a project called “Feathers in My Pocket”.  It’s an idea I’ve been waiting to develop for several years.  I’ll be posting more about it later this week. I find myself working on a wide spectrum of projects from artists’ books to painting to stitching and more.  Today my focus is taking photos and writing so this blog can be posted and shared with you.

Some of my current work "in process"

Some of my current work “in process”

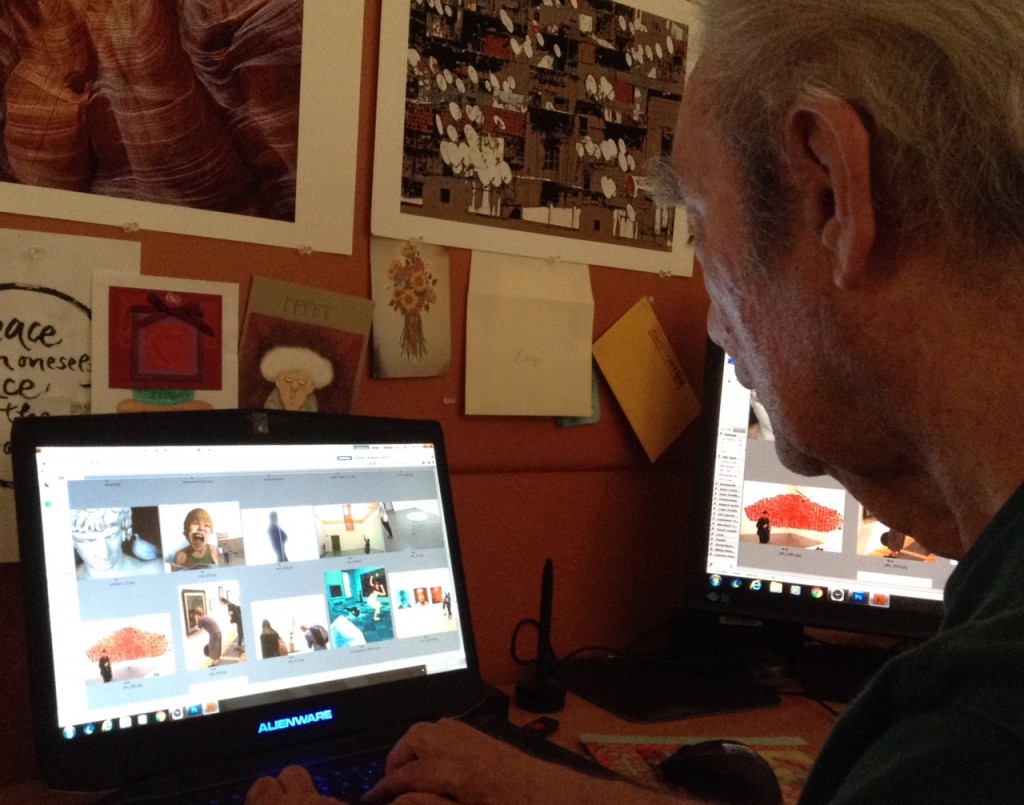
This summer we both took a class at Santa Fe Workshops with Karen Divine, (www.karendivinephotography.com) an extraordinary artist who works with her iPhone photographs to develop unique composited work – all done on the iPhone desktop!  Ever since returning home Ed has been exploring the concepts he learned with her and is now working on a series using material he has shot in museums.  You’ll be able to see some of it at (www.zenfolio.com/eddddean) I don’t know just when they will be posted, but he promises it will be “soon’!!!

Ed in his "studio".

Ed in his “studio”.

Our “art retreat” idea has worked so well for both of us that we have decided to set aside the last week of each month for this type of “at-home” creative traveling.  We’ve discovered that it is a wonderful way to break our daily patterns, explore our creative thoughts and “travel” without having to go through the hassles of airport security or full days of stressful driving.

“Spirit of the Desert” – an Encaustic Assemblage

In my studio I have a number of unfinished projects just waiting for the day they get moved to the top of my “to do” list.  I begin every summer with the intention of finishing all of them, but that hasn’t happened yet!  This summer “ Spirit of the Desert” made it to the top of my list and I am happy to say it is done!.

I started it over five years ago.  I had built a polymer clay head and finished it with acrylic paint, pearl powders and amber shellac.  I then torched it to bubble and move the shellac which resulted in very interesting the final surface.  But the project came to a halting stop when it came to deciding just how I was going to use it.  The head needed some kind of a base or body.  I knew I wanted it to sit among dessert detritus but none of  the cholla stems, wooden sticks, or unique rocks I had gathered suited the mood I was trying to create so I set everything aside for another year.  Every summer I would revisit the box containing the components and I’d start pondering the problem again all over again with little success.

Then last year I came up with the idea of creating my own base.  I used a can filled with gravel and covered it with “desert-like” texture.  At last I was moving forward!  I realized that the fragile plant materials that I wanted to use needed some form of treatment to preserve them.   I determined that encaustic made from amber beeswax and damar varnish would be an excellent solution, so I treated my collection of pods and leaves with the encaustic and set them aside.  Once again I was in a holding pattern waiting for my muse to divulge the next step.

My vision was to create a soulful image that conveyed the joy and wonder I feel here in the Sonoran desert.  When we first moved here from a lush northern California environment, I felt I was in strange terrain – dry, hot, prickly and mostly devoid of life.  Was I ever wrong!  I came to enjoy this desert that specializes in survivorship!  It’s hard to live here with so little water and so much heat, but desert creatures have accommodated with thick skins, hard covered seeds, shallow roots and special leaf structures to soak up the moisture when it’s available.  It’s a tribute to the adaptability of life on our planet!

This summer I discovered the project box in the back of my art closet and decided this was the year to get it finished!   It lived on my art table for several weeks while I arranged and re-arranged and adjusted the materials until finally, I was ready to commit to the final assembly.  With a little cheering from some of my art friends I present to you the finished “Spirit of the Desert”.

Naature boy

Small Quilt

Web mini quiltI made this quilt in a wonderful class taught for PaperWorks by Jane LaFazio in March.  I call it “Journey of the Spirit”.  I thought I had posted it, but I guess I didn’t!

Jane designed the class around nine writing exercises one for each of the nine component squares.  Each of the exercises centered around some aspect of our personal spiritual development.  We started each one by journaling with a gel pen on plain fabric. I chose to use an assortment of writing styles and plain neutral fabrics during these exercises, thereby adding interesting textures to the handwritten elements.

Next we tore the fabric into small pieces to be collaged on to the squares along with fabrics that we had brought to the class.  For each square Jane challenged us by introducing additional techniques including embroidery stitches (ladder stitch, French knots, loop stitch), design problems to solve (landscape layers, pockets, encasements) and items to incorporate such as beads, buttons and milagros.

From the on-set of the project, I decided to limit my palette to golds, greens and blues along with black and white.  I also decided upon finishing the squares, that I would add unity to the project by “glazing” the pieces with sheer fabrics.

While I was not able to complete the quilt in the class, I enjoyed having additional time for applying embellishments at home and stitching the squares to the thick felt background provided by Jane.  I now have a lovely piece infused with personal memory in the form of writing and other added memorabilia.  Just looking at it makes me happy.

This year stitching has become a very enjoyable addition to my creative activities.  I especially like it because of its portability – everything I need to work on a little mini-quilt can fit into a quart baggie which I can stuff into my purse and carry with me.  And it’s something I can do while half-watching TV with my husband.

Posted in Art

Creative Process, Mini Quilts, Fabric Pins & Dolls!!!!

My Creative Process

In recent years I’ve found a most enjoyable approach to making art and I’d like to share it with you.  I’ve read about other artists and how they approach their work.  Some plan out their project in great detail before they begin.  I’ve tried that approach and it doesn’t work for me at all.  Anything that’s “super-planned’ usually ends up in my trash can.

Gathering

Gathering is the first stage of each project I undertake.  For years I’ve kept an idea file.  I have a huge stack of ideas and every once-in-a-while I’ll go through the stack to see if any of the ideas still have “juice”.  The ideas that stay on top become project candidates.  They get put on my project list where they can live a long time before I take any further action.   When I start to get serious about an idea, I create a project box (I like the clear Iris scrapbooking box from Michaels) and begin to gather related ideas, materials, models, photographs, articles – anything that I might use to develop the project further.

Marinating

When the box gets full I start working with the contents and playing around with “stuff” to see what my next steps should be.  I decide what kind of project it will become – book, collage,assemblage, or piece of fiber art.  The time I spend playing at this stage is great fun.  I love Pinterest and I often review my “pins” to see if there are any interesting ways to expand my thoughts.    It’s exciting to revisit the colors, shapes, textures and ideas I’ve filed away.  Often inspirational flashes will come that help me “jump-start” the project.

Producing

When the time comes to construct the project, I have a clear idea of how I will begin.  As I’m building the piece I let the work guide me. I do one thing at a time and the work directs the next step.  This keeps me from feeling overwhelmed.  Since it is a discovery process, I don’t usually know what the finished project will look like.  But I do know when the work is done, because it tells me intuitively when there is nothing left to do.  By keeping an open mind, I experience delightful creative discoveries and hopefully a unique finished product.

This is what I like most about making art!!!!

Mini Quilts
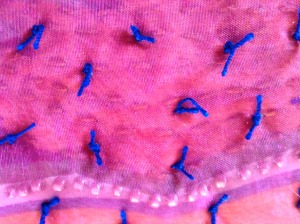
MinidetailInspired by my friend, Barbara Snow from Bellingham, WA, I’ve been having a lot of fun making small quilts using running stitches and French knots.   I’m not a quilter but the idea of a card sized quilt made with fabric scraps and running stitches was appealing.

To get me started Barbara gave me a baggie with a small pile of fabric bits and pieces and some cotton batting.  One could use several layers of old sheeting, percale, or a piece of felt instead of batting.  There was also a piece of scrap fabric for the backing that coordinated with the scraps of fabric in the bag, some sheer fabric (netting, organza etc.), ribbon, and several kinds of thread.  The only additional tools I needed  were scissors, needles, a thimble, pins and beads.

I started by making a “cloth sandwich” with a piece of printed fabric, cotton batting and a piece of an old sheet.  I basted these together about 1/2 inch from the outer edge and then to make sure the fabric didn’t shift, down the middles.

Then the fun began.  After staring at the piece for while, I start stitching without any real  plan for the finished product.  I ran a line of stitching from one edge to the other.  It turned out to be a horizon line.  Then I started stitching around some of the shapes.  Next I added some knots for texture and some beads and more stitching.  Each time I changed materials I asked the work to tell me what to do next.  I used the sheer fabric (netting and organza) to “glaze” the surface.  I tacked the fabric in place with tiny stitches and then added some beading on top to anchor it in place.

The final step involved adding a backing to protect the stitching.  I cut a piece of fabric slightly larger than the little quilt.  Next I folded in the quilt edges to the inside and basted them in place so that they formed a finished edge.  To finish the back and protect the stitching, I cut a piece of fabric and pressed under the edges so it almost met the quilt edge.  I used a blind stitch to hold it in place!  And my little quilt was done.
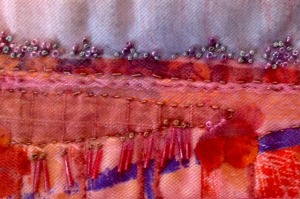
Card QiiltThis was so much fun to make.  It was finished in several hours – mostly while I watched TV with my husband.  I decided that this type of project is a perfect travel activity because the materials and equipment fit nicely into a baggie, and most of the work can be done in my lap.

For fun, I made up some baggies with fabric, batting, beads, and thread and gave them to friends, just in case they wanted to try it out.

A Hug and A Kiss!!!

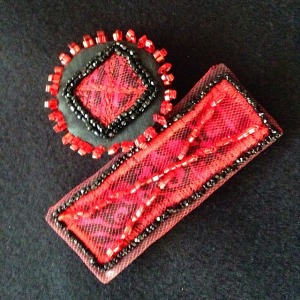
These mini pieces of stitchery were originally going to be used on a mini quilt.  But I found myself uninspired.  Then I thought I’d use them on my birthday doll.  But that didn’t speak to me at all.  I finally decided that I would turn them into fabric pins.  I finished the rectangle with the big X on it and realized that I had beaded a “kiss”.  If I placed the small square in a circle and it could be a “hug”.  It was easy to finish up both pins!!  I love the way they work together on a dark jacket.
Hug&KissDonatella – My 2014 Birthday Doll

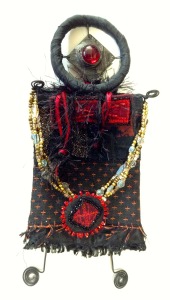
I just finish my birthday doll for 2014.  Her name is Donatella.  She was a lot of fun to create and a good example of my personal creative process in action.

I started her several weeks before my birthday  by looking at my Pinterest file on art dolls.  I had no visual idea for what the doll might be. Next I started gathering materials. The collection included fabrics caught my fancy, a big of metal “findings’, a drawer full of yarns and ribbons and a multitude of beads of all sizes that seemed to go with the fabrics in the pile.

I spent an evening playing with all this stuff, and making little stacks of things that seemed to go together.  I had several small pieces of red stitching on dark fabric that I thought I might use in a mini quilt, but then I thought it might be fun to use them on the doll.  I vacillated back and forth but the stitchery didn’t go with any of the stacks.  So I set them aside for another project.

I was drawn to a piece of crazy quilted fabric I had made several years ago for a fabric bead project.  I kept coming back to it so I knew it had to be part of the doll.

Once that decision had been made, the doll began to take form.  I found the jeweled piece which told me it was part of the doll’s head.  I felt it was too small to be the whole head so I formed a wire circle and wrapped it with black taffeta.  Voilla!  Donatella’s head appeared, and from that point on I began to see her as a finished doll.

I knew the fabric would be used for the body.   My initial thought was to stuff the body, but somehow that didn’t feel right.  Playing with fabrics I formed a body shape that worked with the head.   Next I formed a petticoat which provided dimension without making an actual stuffed body part. I studied the head with the body and determined  that the legs and arms would be formed with wire and beads.

The biggest challenge came in how to “engineer” the component pieces so they worked together.  After I made the arms and legs and I had to figure out how to attach them.  I ended up using glue and stitching.

The final step was embellishment to enhance her personality.  I used ribbon and yarns to create a scarf.  My final delight came when I added more color.  I put the “hug” in the hands of Donatella and used the “kiss” as the yoke of her dress, coming full circle back to my original intention of including the little red stitcheries.

Donatella now lives on my studio wall as a sweet reminder of achieving my 77th year!
IMG_0826

Proces at the Process Museum

Last week I had another delightful Tucson experience when I visited the Process Museum for the first time. What an incredible surprise it was. It is tucked away in a huge (77,000 square feet) warehouse on Kolb Road across the street from the I-10 entrance. It’s the passion and pride of John Wells, who was our guide through this amazing place.

John Wells appreciates and collects art. He also owns this huge property and has dedicated it to exhibiting and honoring creative process of artists. Many of the people who are represented in this showcase have a connection with Tucson.

The goal of the museum is to reveal the totality of the creative process. This means that visitors will see the work of the artist along with all the other kinds of “stuff” an artist has in the studio: furniture, storage lockers, sketch books, note books, reference books, art supplies, wood, canvas, plastic, paper metal, fiber, wire, and fabric waiting to be used. It also includes work in all stages of the creative process from initial conceptualization and layout to iterations of an idea in various stages of development. Walls and corridors are covered with art pieces. One sees an idea explored by the artist multiple times.
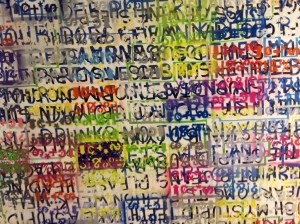
word mural
This museum is the repository of more art than I ever imagined I would or could see in a span of two hours. It is overwhelming and absolutely hypnotic in it’s power. As I walked through the space I was consumed by the enormity of the undertaking but also delighted by the opportunity to witness the work. Not just the good work that gets curated into shows but all the other work that gets produced along the way and then hidden in closets or painted over because for some reason the artist has decided it doesn’t work. Let’s face it, much of the work an artist makes is not for public consumption. Making the art is just part of the creative process.

The museum is currently the home base for seven working artists. There were several on site during our visit. We wandered the corridors and peered into the rooms where pieces were in process, stored or displayed.
tomrossi
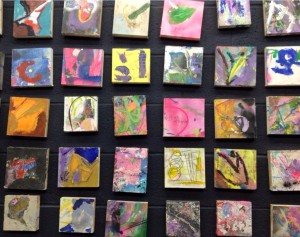
Work ranged from a room filled with 1080 4”x4” pieces done by Thomas Rossi to a show of “Collateral Surfaces” – the surfaces on which art is made (tabletops, drop cloths, palettes etc.) to a room filled with storage shelves crowded with the ceramic pieces of Michael Cajero. The work of the late Owen Williams, a favorite artist of mine, was hung in a room dedicated to him and furnished with tables, chairs and other items from his studio. Across the hall were shelves loaded with the tools he used to make his unique dimensional paintings.
owen williams
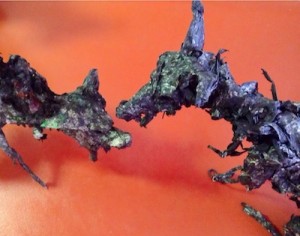
The last stop of our tour was a building completely devoted to the incredible wire and paper sculpture of Michael Cajero. Hundreds of dark pieces tastefully displayed with sensitivity against white walls with red floors and suitable lighting greeted the viewer. I can not tell you how moving it was to see this massive collection. Cajero’s work has energy and excitement. It is complex and yet it is basic. It compels you to look and evokes feeling within you. Wells has aptly labeled the little known or recognized Cajero as one of the most important artist of this century. And after seeing his amazing ceramics and sculptures, I definitely agree with him. Currently Cajero’s 2,500 drawings and paintings have yet to be displayed. It will surely be something to look forward to.
cajero coyote
I encourage you to visit this amazing art wonderland at 8000 North Kolb. It is a private collection open to the public by appointment only. You can contact John Wells through the Process Museum’s website www.processmuseum.org or by phone at 520-404-0596.
You won’t be disappointed.
cajero coupe

Creativity and Futurism Right Here in Tucson

There are times when Tucson really surprises me. I had no idea of the unique ways creativity and innovation are being nurtured in this city. Recently I attended a very interesting program sponsored by CASA (Contemporary Artists of Southern Arizona). Tony Ford, a futurist with a passion for the arts and technology, gave us an exciting overview of the future from his perspective and the ways Tucsonians are embracing it.

It was both a “nudge” to take notice of how things are rapidly changing and an invitation to climb aboard. For instance he cited that there are currently about 5 billion cel phones in operation all over the world. One billion of these are smart phones BUT he points out that in five years there will be five billion smart phones in use. That means there will be five billion people around the world that can interact with each other; learn from each other, impact each other. This amazing pocket instrument gives us immediate access to the whole world whenever we want it and wherever we are! It unlimits our access to Planet Earth. This has amazing implications for all aspects of our life as we know it today.

It leads one to wonder about how quickly some of our most treasured institutions will be come antiquated! Take education. Will we continue to need brick and mortar buildings when we can take on-line classes offered by institutions all over the world? The smart phone is our ticket to unlimited self-directed education? To what extent will we need to books, cd’s and dvds when all we need to do is power up our phone.

Tony talked about other provocative trends. For instance he suggested that most people under the age of thirty have spent 10,000 hours playing video games. The way they applaud others is in “game” mode with “likes” and “accumulating points”. Look at Facebook, Twitter, etc. and you realize the future is now. We click to clap, and we abbreviate whenever possible. (LOL), and we do it instantly from wherever we happen to be. Are we loosing our ability to relate face to face!!

Tony pointed out that many young people can not find jobs using their skills and training. When they are not working minimum wage jobs they are using technology to explore and develop future opportunity and income generation.

I urge you to explore what Tony and his associates are up to. He is a principal in an on-line artisan marketplace – “Art Fire”. www.artfire.com You’ll see it is a platform for personal selling and promotion.

Tony is also deeply involved in Maker House www.makerhouse.org – a new collaborative artisan, maker, education, tech, and gathering space that recently opened in the Downtown Tucson Arts District Tech Corridor.
It is located at 283 North Stone. This area of our city is becoming a mecca for artists, scientists, innovators and creative thinkers to gather.

All sorts of things happen at Maker House. You might find yoga and martial arts classes in the 5,000 square foot courtyard, latte art and hand brewing coffee classes in a classroom sized coffee bar, classes and training in 3D printing* and design, and dance classes in the mural room. What’s so unique is the intersection of disciplines. For instance a recent class “Knit to Death” provided instruction in knitting, as well as using knitting needles for self defense.! A Saturday “think-tank” focused on how one might launch eggs! This is definitely a place to keep checking out as the possibilities for interesting things happening here is endless!!

* If you don’t know about 3 D printing do a search for it today. You will be astounded. It make make factories obsolete. You won’t have to go to the store to buy something. You’ll just create it at home with your 3-d printer.
Wikipedia has an interesting article that gives a good overview of what this new technology is all about.

exotic flower