Some of you know that for the past 5 years I’ve made a doll to celebrate my birthday. With Ed missing, it was not a day I was looking forward to at all. I scheduled it fully so there wasn’t a lot of time to be alone. I spent the morning in a meeting and took a class in the afternoon and went out for dinner to co-celebrate birthdays with friends. Came home exhausted and went directly to bed.
I started the next day and decided to make a simple “stuffie” style doll with beaded embellishment. As a “process” artist my projects evolve and I never know at the start what the finished result will be. I selected percale for her form which I painted with diluted acrylics. While the fabric was drying I collected fabric scraps, bits of ribbon and beads. These included batik quilting scraps, golden organza and scraps of a grid-like fabric, magenta ribbons (from my sister’s birthday gift packages) and gold, red, magenta and green beads.
I cut out four rectangular layers (3 percale and 1 thin white felt) for the dolls body. After setting aside one layer for the back of the doll, I made a fabric sandwich (percale, white felt, percale) and basted the layers together. Next I drew the doll shape on to the top layer which I then machine stitched in place. My first embellishment was to tack the golden grid fabric on the body of the doll. After fooling around with the golden organza I decided to use it for hair as I couldn’t find a good place for it on the doll’s body. Next came beading, then the application of the leaf shapes on the bottom of the doll, more beads and finally a face which I painted on percale and then hand-stitched in place.
I didn’t have a clear vision for the hair, and I wanted to use the organza, so I started playing and voila! I found I was accumulating strands of hair. I knotted them and added beads and found I had created braid-like ropes! When I pinned them into the top of the head they fell into a unique hairdo which seemed just right.
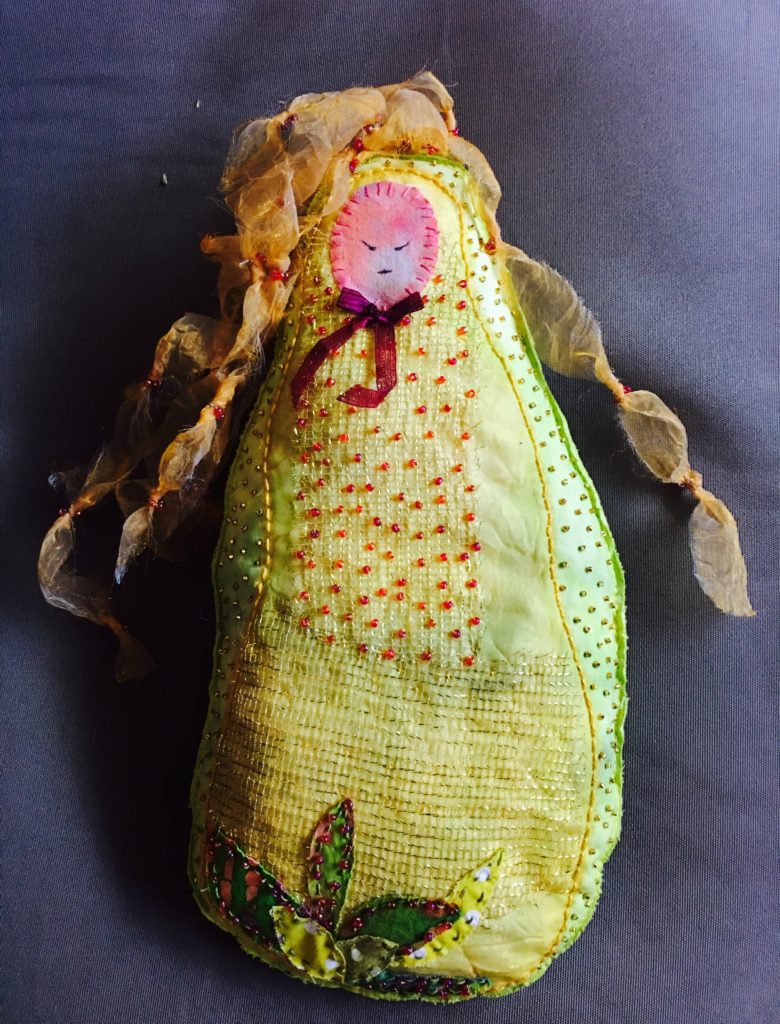
I fashioned a hanger from some wire and sewed it on to the back reinforced with several layers of scrap percale. I made a 1.5” slice vertically down the back for stuffing access. Next I pinned the back on to the top layers and machine stitched the doll around the edges several times. Using sharp scissors, I trimmed off the excess fabric leaving about 1/8” around the outside stitching. On the back side I ran a thin bead of PVA over the stitching so it couldn’t unravel. The final finish of the edges involved dipping my finger into diluted acrylic paint and rubbing the exposed raw edges. I like the way that the green paint serves to further define the edge.
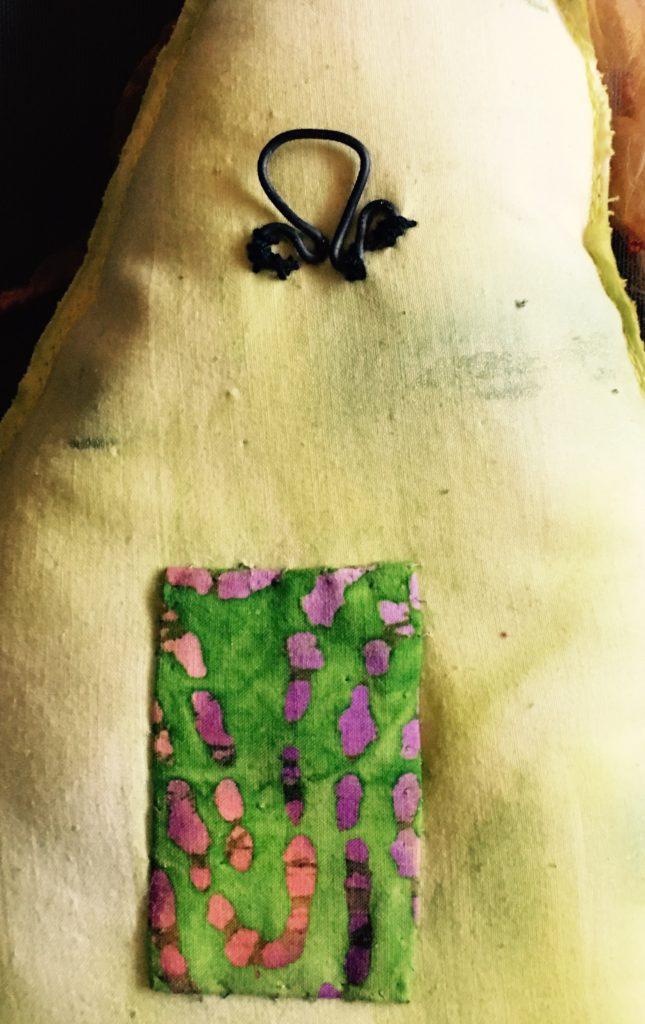
I ended by tacking her hair in place on the body as it had a mind of it’s own, going in places I did not want it to land and covering the slit on her back with a decorative patch.
Now, it’s time to dream up a new project. In the meantime, I trust you are happily involved with your own projects and it being October I’m guessing that your fall calendar is already filled to the brim.