A New Artist’s Book

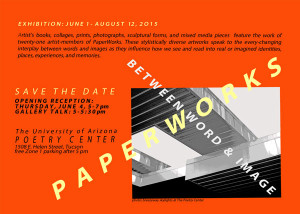
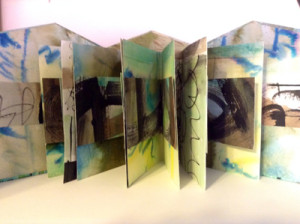
My most recent artist book, “The Edge” has been selected for inclusion in the show “Between Word and Image” at the University of Arizona Poetry Center, 1508 East Helen Street.  The show opened June 1 and will continue until August.  If you are free tonight, June 4, do come to the reception.

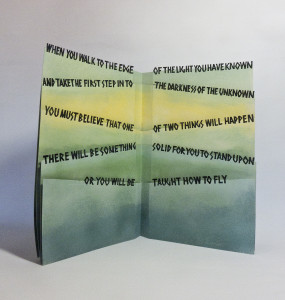
pw_pc_eviteWhen “edges” was selected as this year’s theme for our PaperWorks mixed media study group,  I started exploring many different meanings and graphic approaches to edges – alone, with the group and with others.  I decided to feature a favorite quote by Patrick Overton for my submission to this show.

For me the quote conjures up a vastness which I represented with a layered landscape.  Pastels added atmosphere and I took advantage of  the pages to contribute depth. I chose Stonehenge paper which I toned with pastels to create the landscape backgrounds.

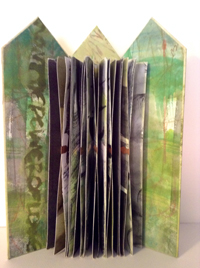
Next I broke the quote down into five parts and wrote them on the upper edges of the folios.  Next I cut along the edges of  the individual letters.  I like the way the Neuland calligraphy cast shadows on the layers of background.

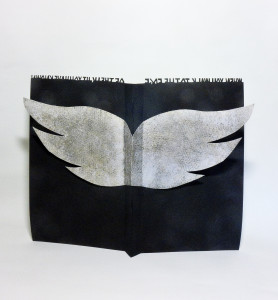
BlogThe Edge Inside copyI wanted the work to have an element of surprise – something I’ve been doing in recent pieces.  Placing wings on the cover did the trick.  Whichever way you start viewing the book, the other side provides an unexpected visual.

BlogThe Edge outside  copyMy photography skills do not do the book justice.  It is 14” tall.  When the individual pages are set up nesting inside of each other to enable the shadows to be cast, it is about 16” wide.  I hope you will be able to experience it while it is on display at Poetry Center.  The show will be open through August 12 this year.

Immersed in Texture

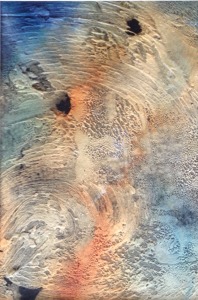
Several weeks ago I spent three days in a workshop sponsored by the Contemporary Artists of Southern Arizona – www.casaaz.org . They had brought in the popular and excellent teacher, Jackie Sullivan, www.jacquelinesullivan.com to do a class on working with texture.Merrily

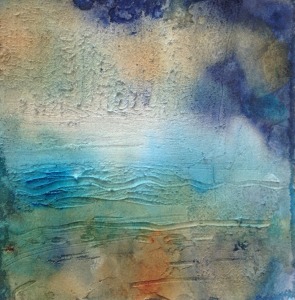
For me the workshop was extremely informative and productive. I don’t judge a workshop by how much work I finish because I am a fast worker and usually complete several pieces in a class. I judge workshops by how much I learn and how hard I am pushed by the instructor to explore my “edges”. Jackie did that very well! I left feeling I had learned some new “tricks” and I ended up with a number of pieces ready for mats!Ocean's Edge

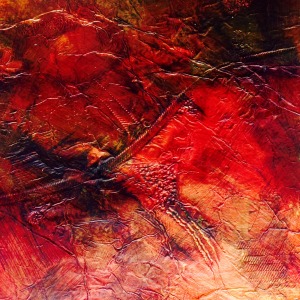
I particularly liked Jackie’s way of transforming aluminum foil into an interesting collage material. The way she layered pieces on to her work to give work additional dimension was interesting. Her use of mediums was fun to revisit, and her unique way of building a painting was new to me.Red Wonder

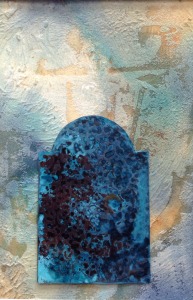
Jackie likes sparkle and she had a number of ways to incorporate “glitz” on to the page. Years ago she and Victoria Pittman developed a wonderful class that was presented at the annual calligraphy gathering at Sonoma State in 2000. While I did not take that particular class, I have taken that same metallics workshop three separate times and have learned something new each time. I don’t think Victoria is offering it any more, but Jackie does include some of the techniques in her texture class.Blue Door

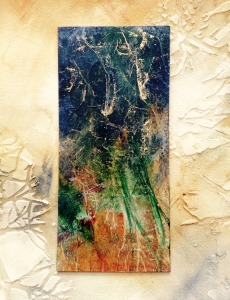
I won’t give away Jackie’s secrets but she said many of the techniques that she taught are demonstrated on the video offered for sale on her website. Forest

Creative Process, Mini Quilts, Fabric Pins & Dolls!!!!

My Creative Process

In recent years I’ve found a most enjoyable approach to making art and I’d like to share it with you.  I’ve read about other artists and how they approach their work.  Some plan out their project in great detail before they begin.  I’ve tried that approach and it doesn’t work for me at all.  Anything that’s “super-planned’ usually ends up in my trash can.

Gathering

Gathering is the first stage of each project I undertake.  For years I’ve kept an idea file.  I have a huge stack of ideas and every once-in-a-while I’ll go through the stack to see if any of the ideas still have “juice”.  The ideas that stay on top become project candidates.  They get put on my project list where they can live a long time before I take any further action.   When I start to get serious about an idea, I create a project box (I like the clear Iris scrapbooking box from Michaels) and begin to gather related ideas, materials, models, photographs, articles – anything that I might use to develop the project further.

Marinating

When the box gets full I start working with the contents and playing around with “stuff” to see what my next steps should be.  I decide what kind of project it will become – book, collage,assemblage, or piece of fiber art.  The time I spend playing at this stage is great fun.  I love Pinterest and I often review my “pins” to see if there are any interesting ways to expand my thoughts.    It’s exciting to revisit the colors, shapes, textures and ideas I’ve filed away.  Often inspirational flashes will come that help me “jump-start” the project.

Producing

When the time comes to construct the project, I have a clear idea of how I will begin.  As I’m building the piece I let the work guide me. I do one thing at a time and the work directs the next step.  This keeps me from feeling overwhelmed.  Since it is a discovery process, I don’t usually know what the finished project will look like.  But I do know when the work is done, because it tells me intuitively when there is nothing left to do.  By keeping an open mind, I experience delightful creative discoveries and hopefully a unique finished product.

This is what I like most about making art!!!!

Mini Quilts
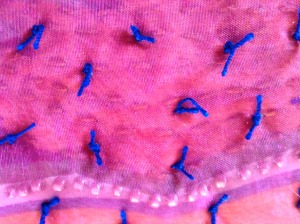
MinidetailInspired by my friend, Barbara Snow from Bellingham, WA, I’ve been having a lot of fun making small quilts using running stitches and French knots.   I’m not a quilter but the idea of a card sized quilt made with fabric scraps and running stitches was appealing.

To get me started Barbara gave me a baggie with a small pile of fabric bits and pieces and some cotton batting.  One could use several layers of old sheeting, percale, or a piece of felt instead of batting.  There was also a piece of scrap fabric for the backing that coordinated with the scraps of fabric in the bag, some sheer fabric (netting, organza etc.), ribbon, and several kinds of thread.  The only additional tools I needed  were scissors, needles, a thimble, pins and beads.

I started by making a “cloth sandwich” with a piece of printed fabric, cotton batting and a piece of an old sheet.  I basted these together about 1/2 inch from the outer edge and then to make sure the fabric didn’t shift, down the middles.

Then the fun began.  After staring at the piece for while, I start stitching without any real  plan for the finished product.  I ran a line of stitching from one edge to the other.  It turned out to be a horizon line.  Then I started stitching around some of the shapes.  Next I added some knots for texture and some beads and more stitching.  Each time I changed materials I asked the work to tell me what to do next.  I used the sheer fabric (netting and organza) to “glaze” the surface.  I tacked the fabric in place with tiny stitches and then added some beading on top to anchor it in place.

The final step involved adding a backing to protect the stitching.  I cut a piece of fabric slightly larger than the little quilt.  Next I folded in the quilt edges to the inside and basted them in place so that they formed a finished edge.  To finish the back and protect the stitching, I cut a piece of fabric and pressed under the edges so it almost met the quilt edge.  I used a blind stitch to hold it in place!  And my little quilt was done.
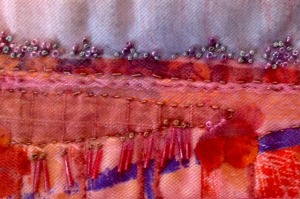
Card QiiltThis was so much fun to make.  It was finished in several hours – mostly while I watched TV with my husband.  I decided that this type of project is a perfect travel activity because the materials and equipment fit nicely into a baggie, and most of the work can be done in my lap.

For fun, I made up some baggies with fabric, batting, beads, and thread and gave them to friends, just in case they wanted to try it out.

A Hug and A Kiss!!!

These mini pieces of stitchery were originally going to be used on a mini quilt.  But I found myself uninspired.  Then I thought I’d use them on my birthday doll.  But that didn’t speak to me at all.  I finally decided that I would turn them into fabric pins.  I finished the rectangle with the big X on it and realized that I had beaded a “kiss”.  If I placed the small square in a circle and it could be a “hug”.  It was easy to finish up both pins!!  I love the way they work together on a dark jacket.
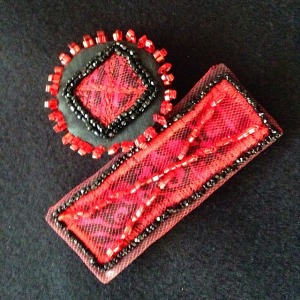
Hug&KissDonatella – My 2014 Birthday Doll

I just finish my birthday doll for 2014.  Her name is Donatella.  She was a lot of fun to create and a good example of my personal creative process in action.

I started her several weeks before my birthday  by looking at my Pinterest file on art dolls.  I had no visual idea for what the doll might be. Next I started gathering materials. The collection included fabrics caught my fancy, a big of metal “findings’, a drawer full of yarns and ribbons and a multitude of beads of all sizes that seemed to go with the fabrics in the pile.

I spent an evening playing with all this stuff, and making little stacks of things that seemed to go together.  I had several small pieces of red stitching on dark fabric that I thought I might use in a mini quilt, but then I thought it might be fun to use them on the doll.  I vacillated back and forth but the stitchery didn’t go with any of the stacks.  So I set them aside for another project.

I was drawn to a piece of crazy quilted fabric I had made several years ago for a fabric bead project.  I kept coming back to it so I knew it had to be part of the doll.

Once that decision had been made, the doll began to take form.  I found the jeweled piece which told me it was part of the doll’s head.  I felt it was too small to be the whole head so I formed a wire circle and wrapped it with black taffeta.  Voilla!  Donatella’s head appeared, and from that point on I began to see her as a finished doll.

I knew the fabric would be used for the body.   My initial thought was to stuff the body, but somehow that didn’t feel right.  Playing with fabrics I formed a body shape that worked with the head.   Next I formed a petticoat which provided dimension without making an actual stuffed body part. I studied the head with the body and determined  that the legs and arms would be formed with wire and beads.

The biggest challenge came in how to “engineer” the component pieces so they worked together.  After I made the arms and legs and I had to figure out how to attach them.  I ended up using glue and stitching.

The final step was embellishment to enhance her personality.  I used ribbon and yarns to create a scarf.  My final delight came when I added more color.  I put the “hug” in the hands of Donatella and used the “kiss” as the yoke of her dress, coming full circle back to my original intention of including the little red stitcheries.

Donatella now lives on my studio wall as a sweet reminder of achieving my 77th year!
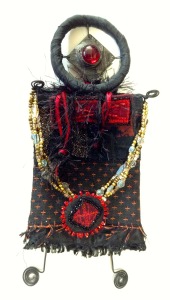
IMG_0826

Drawing Adventures

When it comes to drawing I usually use a sketchbook or a good piece of art paper. After I’ve finished the drawing I may add color or I may leave it alone. I’ve never given much thought to the particular surface that I draw on.

This past week at a two-day class titled “ Exploring the Surface: Mixed Media Drawing on Paper”, I tried a whole new approach! The instructor was Catherine Nash, well-known papermaker and encaustic artist who has a personal passion for drawing.

Our first day began with handling an assortment of papers and making marks on them with a variety of tools to see how each paper responded. We treated some surfaces with sizing, wax-based resists such as crayon and then applied colored washes to create interesting backgrounds and drawing surfaces. We purposefully flooded ink and watercolor on to some areas of asian and hand-made papers so that the color would bleed through to the other side. After they dried we turned them over and worked on the back of the page, using the pattern that had bled through as inspiration for the drawing.

On “Day Two” we used a many kinds of drawing materials: pens, stick dipped in ink, crayons, chalk, pastels, oil pastel, graphite sticks and assorted brands of colored pencils to draw on the surfaces we had created the day before.

Our focus was on experimentation and discovery and layering media to develop richness in our drawings. The surfaces we worked on ranged from “Yupo”, a plastic sheet watercolor artists are working with to soft print-making surfaces and papers made from cotton, kozo and abaca fibers.

Here are some quick photos of things I played with.
71
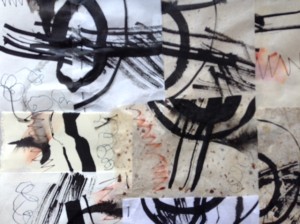
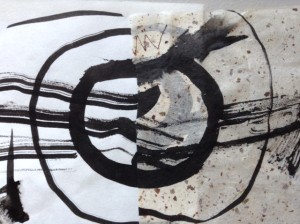
These ink drawings were done as tests to see how papers responded to sumi ink and Noodles drawing ink in fountain pens. I collaged them together with a glue stick and some stitches.8

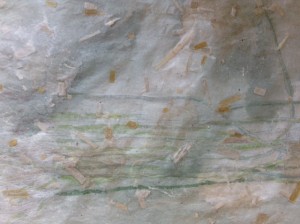
This kozo paper with bark chips in it was further distressed with methyl cellulose painted on it in a few areas (hard to detect) and then watercolor pencil and light wash added in a few areas. Now it’s all ready for a drawing!
2a
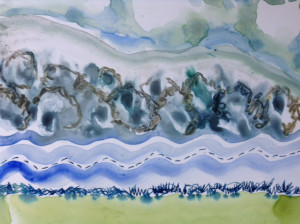
Yupo and watercolor and a few pen marks make for interesting effects. I think I need a whole class on working with Yupo and I seem to remember that someone at the Drawing Studio is teaching one this spring.
4
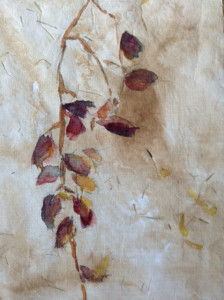
Walnut ink laid gently on to damp sized kozo created the perfect background for a quick sketch of a pistachio branch. I drew it on dried paper with a sick of charcoal and a gentle hand. Next I added the watercolor. After it had dried again, I rubbed off the charcoal and was left with this.5a

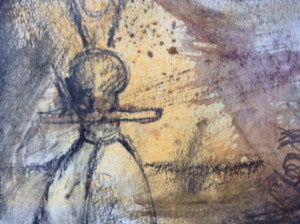
I drew this quickly with a graphite stick on paper that had been toned first with washes and then, when dried, rubbed with some soft pastel (yellow-orange).

Now, as you can probably guess, I’m having a lot of fun making a variety of backgrounds so that I’ll have some ready to draw on.

Welcome 2014

New beginnings.
Here I am several weeks into the new year. My “to do” list has had “Write and post on Wild Sage Art” on it for at least the past ten weeks but somehow I don’t get to it! Maybe this year I’ll do better, but maybe this is the “every-once-in-a-while” blog.

I love beginnings – the new year, summer, the school year, my birthday, the first day of every quarter, the equinox, the solstice, the start of something (project, diet, friendship, workshop). For me each one is cause for celebration for at least a day or two. And that has been true this January too – with an extra special bonus. I had been plagued by an h.pylori infection that was recently diagnosed. After treatment, I am feeling so much better – better than words can describe! I feel like I got my life back – another new beginning to celebrate.

Great workshop.
Last week I took my first workshop of the year – a 12 hour class (over three days) with the extraordinary book artist, Laura Wait. She taught us a dimensional structure she developed several years ago. It utilizes a very wide spine which can support a hanger so that the book can be displayed on the wall. Signatures are spaced widely across the spine and stitched on to the spine with a traditional long-stitch. The hanger (cord or wire) is inserted into the spine through two of the stitching holes.

We started out writing with sumi ink on large sheets of BFK. Our natural handwriting became the foundation for paper embellishment. We experimented with a wide variety of tools from pens, colored pencils and chopsticks to wooden shingles and were encouraged to explore mark-making with anything that could transfer ink or paint on to paper. Over the course of the first two sessions most of us managed to get three layers of ink and/or color on to our papers which resulted in rich tapestries for book pages.

I especially appreciated the comfortable atmosphere that Laura created and would encourage you to take a class with her if you are so inclined. She will be teaching two classes at her Santa Fe studio and in San Diego and San Francisco this year. Check out her website for more details. She limits her teaching just a few weeks each year to make sure that she has plenty of studio time to do her own work. www.laurawait.com
Some of Laura’s favorites for making these painted books:
Paper that folds without cracking.
She likes BFK (heavy – 240 gm) for text pages because they have “bulk. She uses Velin Arches for covering book board and for pages.
Both papers fold without cracking and can handle water and layers of paint.

Watercolor and gouache for painting pages.
She appreciates the quality and extensive color choices of Daniel Smith watercolors. For gouache she often uses Winsor and Newton and Daler Rowney. Inks and liquid watercolor (Hydrus) are also fun to use for this project.

Watercolor pencils with creamy pigment.
When you spray drawn lines, they bleed in interesting ways and they are fun to use when writing on damp or wet paper. Derwent is one brand that is nice and soft.

Easy to handle cover boards.
We used 60 pt. archival case board which was a new product for me. It’s a fairly rigid board that is much denser than mat board. And it is easy to cut when compared to the Davey board most book artists rely on.

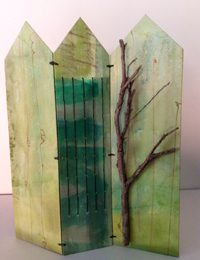
I worked on two books during the class and finished them up this past week. The first book, “Sanctuary”, was informed by writing about trees as I was working on large sheets of paper. I was thinking about how a tree can provide food and shelter for birds and other creatures. When it came time to choose a shape, the tallness of trees and the density of foliage where on my mind. After completing the structure I added the branch to the front cover and placed small copper clips to hold folios together – suggesting safe places found under the canopy and between the leaves.
rSANCTUARY1rsanctuary3
The second book I’ve titled “Markings”. As I looked at the pages I had painted and began to assemble them into signatures, I was struck by the variety of marks and values I had created. Thus the title. When I went to size the book, I created pages that were two contrasting sizes and colors and widely spaced on the spine so there could be movement when the book was handled. This book also has a hanger on the back spine so it can (with a little help from museum wax) be displayed on the wall.
rMARAKINGS2

Proces at the Process Museum

Last week I had another delightful Tucson experience when I visited the Process Museum for the first time. What an incredible surprise it was. It is tucked away in a huge (77,000 square feet) warehouse on Kolb Road across the street from the I-10 entrance. It’s the passion and pride of John Wells, who was our guide through this amazing place.

John Wells appreciates and collects art. He also owns this huge property and has dedicated it to exhibiting and honoring creative process of artists. Many of the people who are represented in this showcase have a connection with Tucson.

The goal of the museum is to reveal the totality of the creative process. This means that visitors will see the work of the artist along with all the other kinds of “stuff” an artist has in the studio: furniture, storage lockers, sketch books, note books, reference books, art supplies, wood, canvas, plastic, paper metal, fiber, wire, and fabric waiting to be used. It also includes work in all stages of the creative process from initial conceptualization and layout to iterations of an idea in various stages of development. Walls and corridors are covered with art pieces. One sees an idea explored by the artist multiple times.
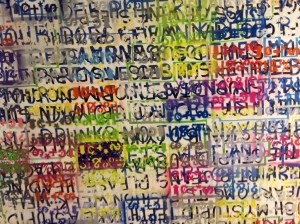
word mural
This museum is the repository of more art than I ever imagined I would or could see in a span of two hours. It is overwhelming and absolutely hypnotic in it’s power. As I walked through the space I was consumed by the enormity of the undertaking but also delighted by the opportunity to witness the work. Not just the good work that gets curated into shows but all the other work that gets produced along the way and then hidden in closets or painted over because for some reason the artist has decided it doesn’t work. Let’s face it, much of the work an artist makes is not for public consumption. Making the art is just part of the creative process.

The museum is currently the home base for seven working artists. There were several on site during our visit. We wandered the corridors and peered into the rooms where pieces were in process, stored or displayed.
tomrossi
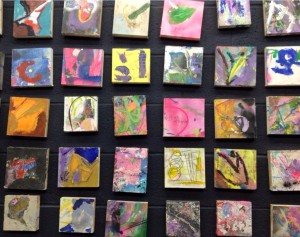
Work ranged from a room filled with 1080 4”x4” pieces done by Thomas Rossi to a show of “Collateral Surfaces” – the surfaces on which art is made (tabletops, drop cloths, palettes etc.) to a room filled with storage shelves crowded with the ceramic pieces of Michael Cajero. The work of the late Owen Williams, a favorite artist of mine, was hung in a room dedicated to him and furnished with tables, chairs and other items from his studio. Across the hall were shelves loaded with the tools he used to make his unique dimensional paintings.
owen williams
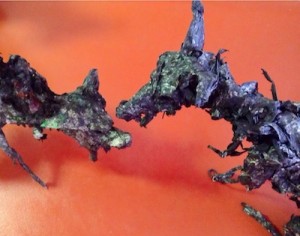
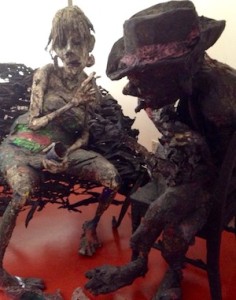
The last stop of our tour was a building completely devoted to the incredible wire and paper sculpture of Michael Cajero. Hundreds of dark pieces tastefully displayed with sensitivity against white walls with red floors and suitable lighting greeted the viewer. I can not tell you how moving it was to see this massive collection. Cajero’s work has energy and excitement. It is complex and yet it is basic. It compels you to look and evokes feeling within you. Wells has aptly labeled the little known or recognized Cajero as one of the most important artist of this century. And after seeing his amazing ceramics and sculptures, I definitely agree with him. Currently Cajero’s 2,500 drawings and paintings have yet to be displayed. It will surely be something to look forward to.
cajero coyote
I encourage you to visit this amazing art wonderland at 8000 North Kolb. It is a private collection open to the public by appointment only. You can contact John Wells through the Process Museum’s website www.processmuseum.org or by phone at 520-404-0596.
You won’t be disappointed.
cajero coupe

Creativity and Futurism Right Here in Tucson

There are times when Tucson really surprises me. I had no idea of the unique ways creativity and innovation are being nurtured in this city. Recently I attended a very interesting program sponsored by CASA (Contemporary Artists of Southern Arizona). Tony Ford, a futurist with a passion for the arts and technology, gave us an exciting overview of the future from his perspective and the ways Tucsonians are embracing it.

It was both a “nudge” to take notice of how things are rapidly changing and an invitation to climb aboard. For instance he cited that there are currently about 5 billion cel phones in operation all over the world. One billion of these are smart phones BUT he points out that in five years there will be five billion smart phones in use. That means there will be five billion people around the world that can interact with each other; learn from each other, impact each other. This amazing pocket instrument gives us immediate access to the whole world whenever we want it and wherever we are! It unlimits our access to Planet Earth. This has amazing implications for all aspects of our life as we know it today.

It leads one to wonder about how quickly some of our most treasured institutions will be come antiquated! Take education. Will we continue to need brick and mortar buildings when we can take on-line classes offered by institutions all over the world? The smart phone is our ticket to unlimited self-directed education? To what extent will we need to books, cd’s and dvds when all we need to do is power up our phone.

Tony talked about other provocative trends. For instance he suggested that most people under the age of thirty have spent 10,000 hours playing video games. The way they applaud others is in “game” mode with “likes” and “accumulating points”. Look at Facebook, Twitter, etc. and you realize the future is now. We click to clap, and we abbreviate whenever possible. (LOL), and we do it instantly from wherever we happen to be. Are we loosing our ability to relate face to face!!

Tony pointed out that many young people can not find jobs using their skills and training. When they are not working minimum wage jobs they are using technology to explore and develop future opportunity and income generation.

I urge you to explore what Tony and his associates are up to. He is a principal in an on-line artisan marketplace – “Art Fire”. www.artfire.com You’ll see it is a platform for personal selling and promotion.

Tony is also deeply involved in Maker House www.makerhouse.org – a new collaborative artisan, maker, education, tech, and gathering space that recently opened in the Downtown Tucson Arts District Tech Corridor.
It is located at 283 North Stone. This area of our city is becoming a mecca for artists, scientists, innovators and creative thinkers to gather.

All sorts of things happen at Maker House. You might find yoga and martial arts classes in the 5,000 square foot courtyard, latte art and hand brewing coffee classes in a classroom sized coffee bar, classes and training in 3D printing* and design, and dance classes in the mural room. What’s so unique is the intersection of disciplines. For instance a recent class “Knit to Death” provided instruction in knitting, as well as using knitting needles for self defense.! A Saturday “think-tank” focused on how one might launch eggs! This is definitely a place to keep checking out as the possibilities for interesting things happening here is endless!!

* If you don’t know about 3 D printing do a search for it today. You will be astounded. It make make factories obsolete. You won’t have to go to the store to buy something. You’ll just create it at home with your 3-d printer.
Wikipedia has an interesting article that gives a good overview of what this new technology is all about.

exotic flower

Bento-style Meals

My husband and I have traveled twice to Kyoto and both times mealtime provided us with some of the most enjoyable memories of our journeys there. I especially liked the pace of dining in Kyoto coupled with the delightful parade of tasty morsels that were brought to the table.

Recently we were talking about food and I recalled how much I enjoyed eating that way. When we got back to Tucson we never got into Japanese cuisine. That was partly because the only Japanese food available here is found in sushi restaurants. My husband is a recovering Catholic who is not a lover of fish and that’s the first thing he thinks of when he sees a sushi sign. So I’ve never seriously tried my hand at preparing Japanese food.

But, last week, it occurred to me that maybe I could modify the Japanese style of presenting food and apply it to the foods we eat at home. I went to Cost Plus and purchased a variety of small plates and bowls to use in presenting bento-like meals. After surfing the interenet for information on Japanese cuisine, and ordering several books from Amazon, I was armed with a basic understanding so I could play more extensively with this approach to our meals.

My first adventure was an experiment in serving sandwiches. Instead of assembling and presenting a freshly made sandwich on a plate, I arranged small plates of sandwich ingredients on trays and we each assembled our own sandwiches as part of the mealtime experience. The plates were very appealing, and we both enjoyed building our sandwiches and savoring the experience.

I must say it has been great fun. And consuming the food – even more fun! Here are some of my first kaiseki-Tucson-style meals.

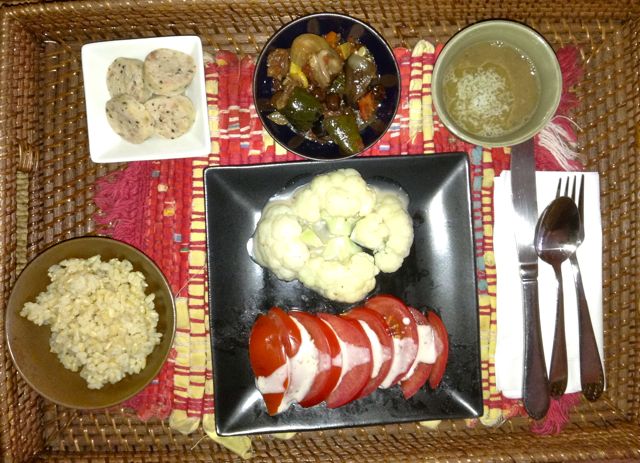
My first attempt included steamed sausage, caponata, miso soup, cauliflower with a vinaigrette drizzle and tomato with ranch dressing, rice.
caponata

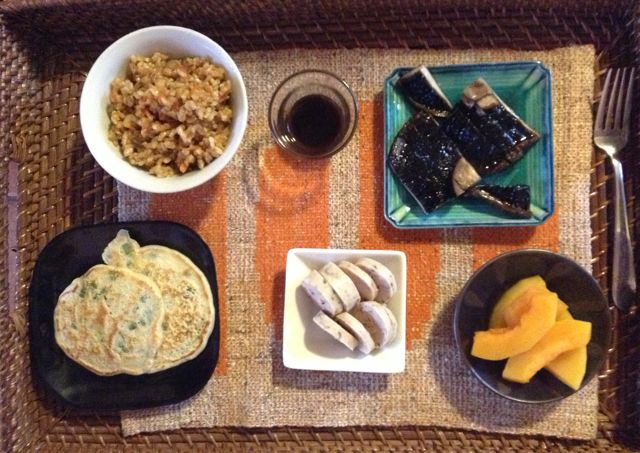
The next tray consisted of fried rice, soy dipping sauce, grilled portobello mushroom, butternut squash seasoned with spicy salt, steamed sausage and onion pancakes.
Onion Cake Bento

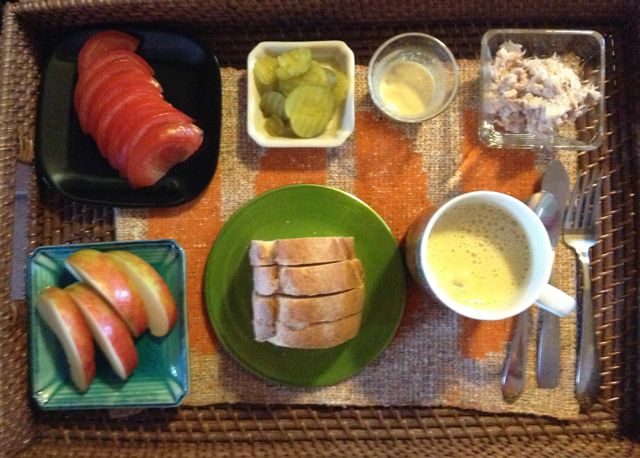
A sandwich meal included sliced tomato, pickles, mayonaise, tuna salad, cold curried soup, whole wheat bread and apple wedges.
Sandwich Bento

I don’t expect to prepare this type of dinner every night of the week. But I do hope to serve bento-style meals at least two or three nights each time it’s my turn to cook.

Note: In 1993 when we began retirement, we also began a take-turn cooking arrangement. It goes like this; you are on your own for breakfast and lunch meals. Dinner is provided by the “cook for the week” who also shops and cleans up. So, for the week you don’t cook, you are a guest in your own home!

This has worked well for us, tho I must admit that my husband would respond to you with a slightly different point of view!!!!

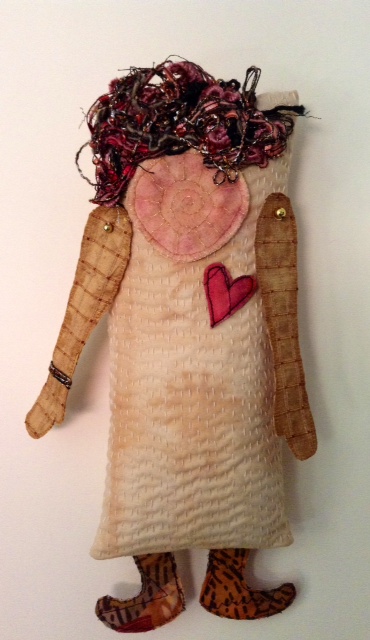
Birthday Doll – 2013

For the past three years I’ve made an “art” doll on my birthday. I got the idea from an article in “Art Doll Quarterly” which featured the work of fiber artist Karen Page who has, for many years, been making dolls to celebrate her birthdays.

This year I decided to make some hand-quilted fabric to use as the doll’s body. I quilted the fabric on a recent trip Ed and I too . We traveled to New York to visit Ground Zero and to Washington D.C. to spend some time with his daughter and her family. Ed returned to Tucson and I stayed on an extra four days to spend time with my Tri Delta sorority sisters at the Sanctuary Retreat Center in Bellsville, Maryland.

I had been collecting doll ideas on Pinterest in recent months but I didn’t have a specific concept for the doll other than to use the quilted fabric. On the morning of my birthday I open gifts from my sister, Barbara. She had used some delightful threads and yarns to tie the packages and I immediately realized they would become the doll’s hair.

After breakfast I sat with the yarns and fabric and consulted my “scrap” box. I pulled out the fabric bits that might fit as I built the doll. From that point on, she took shape quickly as I discovered a crazy quilt scrap to use for her boots and heart and a lovely golden toned gridded silk that became her arms and hands. Assembling her took more time than expected and I didn’t finish her until this morning. Doll2013

While every birthday is special this one took an extra celebratory note as I brought my husband home after spending the night in the hospital. He had just completed a very successful surgery on his left carotid artery. This was his second carotid surgery, the other having taken place last spring. This aging process is certainly challenging but now we can rest a bit easier knowing that the “rivers” in his neck are flowing freely.

Finding Inspiration in Small Collectibles

For a good part of my life I have been drawn to small handmade objects. As a child I collected glass figurines and had a shelf over my bed where I kept my precious collection. When I “grew up” this interest shifted and I began collecting hand-made “fish”. When my father died my sister and I split his small collection of jade and ivory which now reside in my studio along with other small objects collected over the years.

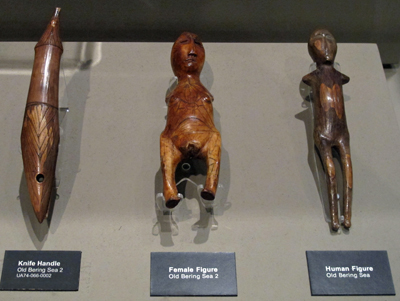
Wherever I have traveled in the world local I am drawn to museum displays of artifacts made from bone, ivory, metal, wood, stone and fiber. And my favorite travel mementos are small beads, amulets, jewelry, dolls and animal fetishes.

As I view these wonderful objects I think about their universal appeal and wonder about when, where and why they were made? How were they handled and used. I know I love to look at and touch my collection. Just having them nearby nurtures my inner creative muse.

If I can’t bring objects home, I can always bring home a photograph. These photos are of objects I’ve encountered recently in my travels:

Small bone and ivory objects are among my favorite inspirations. I love the primitive qualities, the interesting surfaces and sensual shapes. They inspire drawings, dolls and jewelry. And if you want to make similar objects, polymer clay is the ideal medium for creating faux bone and ivory. blogbonecarving

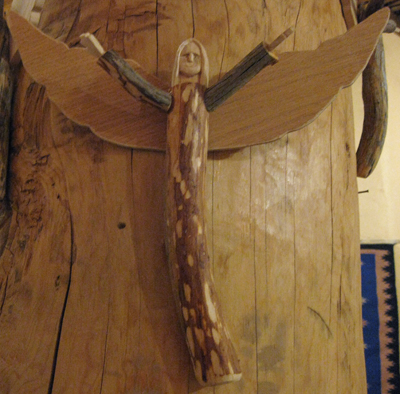
A simple angel figure made from carved twigs and some wooden scraps found on a larger wooden sculpture appealed to me.
blogwooddollonsculpture

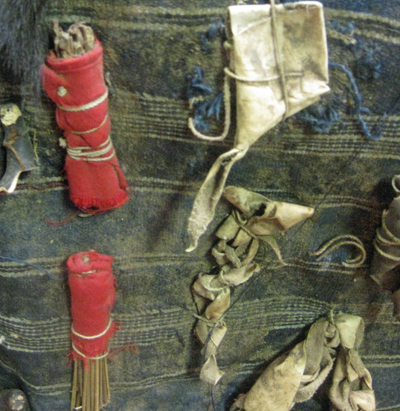
I’m always fascinated by bundles and wraps. These items attached to a blanket wrap have inspired me to wrap and tie fabric and paper into beads and dolls.
blogfabricrollbead
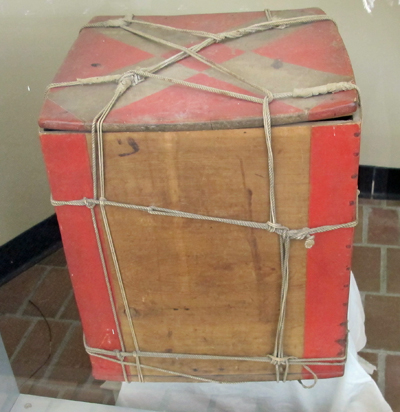
That fascination with wraps goes even further with the concept of making art, putting it into boxes and then tying them up in interesting ways. This Kwakwaka box from Canada was used to store things. Often the boxes were made with a bentwood lid and could be used as an extra seat! They stored just about anything; food, furs, and valuables.
blogwrappedbox
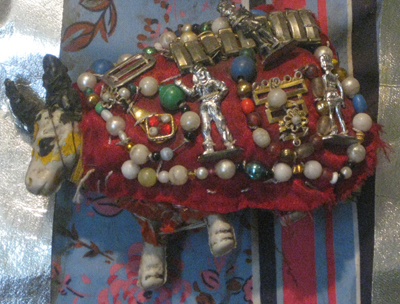
This wonderful doll is covered with found beads and milagros. The last two years I’ve celebrated my birthday by making a doll. I’m thinking that this year it will be a miracle doll – with milagros sewed on it to help keep my body strong.
blogmilagrosdoll
SomeBooks to Explore
If you are interested in these same kinds of folk art you may find the following books particularly interesting:
“Amulets, Sacred Charms of Power and Protection” by Shelia Paine
“Faith and Transformation, Votive Offerings and Amulets from the Alexander Girard Collection” edited by Doris Francis
“Bodyguards, Protective Amulets and Charms” by Desmond Morris
“Amulets and Talismans, Simple Techniques for Creating Meaningful Jewelry” by Robert Dancik

Polymer Clay Workshop with Tory Hughes
Last summer I took a wonderful workshop with Tory Hughes at her studio in Santa Fe. She has an incredible collection of amulet-like objects which serve as inspiration for some of her work. She is one of first artists to use polymer clay to replicate bone, ivory, amber etc. Her work is quite beautiful and her classes are lots of fun. If you will be in the Santa Fe area this summer, check out her website for classes etc.:
www.toryhughes.com

The Dean’s Alaska Adventure
Ed has posted a album of photos we took while we were visiting Alaska and Vancouver. You can view it at: www.eddddean.zenfolio.com (That’s 4 d’s!)